LunaProxy settings
Step 1 - Proxy preparation
Before starting the integration, we need to choose a plan in lunaproxy.com and prepare a proxy.
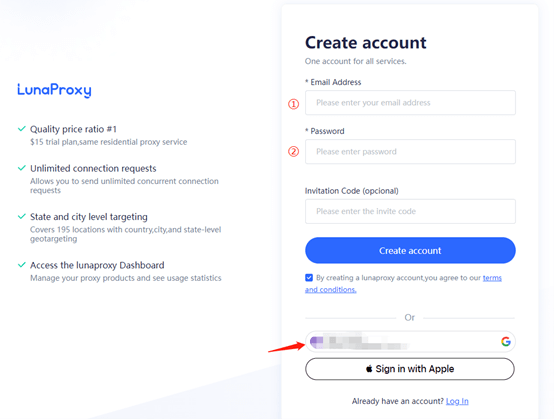
1. Register an account (if you haven't already)/ ① Enter a mailbox ② Enter your password. (you can also choose Google)
2. Go to dashboard.
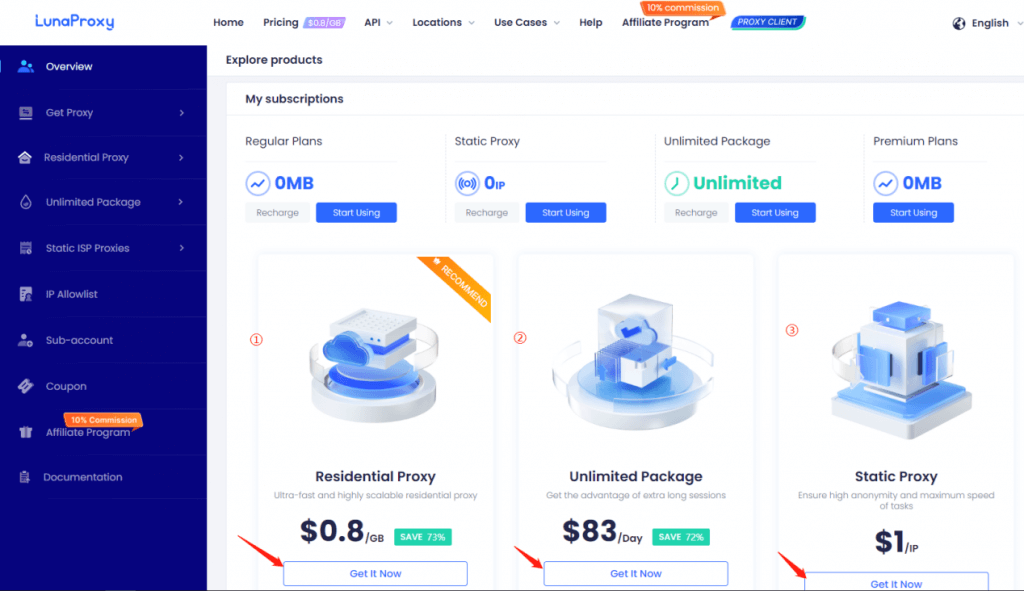
3. If you are visiting the dashboard for the first time, you will be prompted to select a plan based on your needs.
4. After you have chosen a plan, go to the get proxy menu → User & Pass Auth, to select the desired proxies.
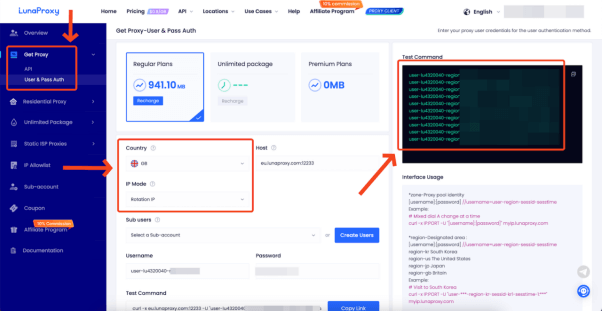
5. Choose the country you want, Proxy type, here I choose is the UK and rotation IP
6. Copy the generated host, port, login and password of the proxy.
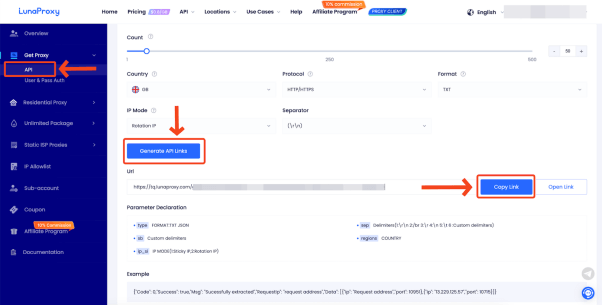
7. To get the URL link for proxy management, go to the API tab.
8. The proxies are ready to be configured.
Step 2- MuLogin Integration with LunaProxy
1. Download MuLogin from their official website, install, and run it.
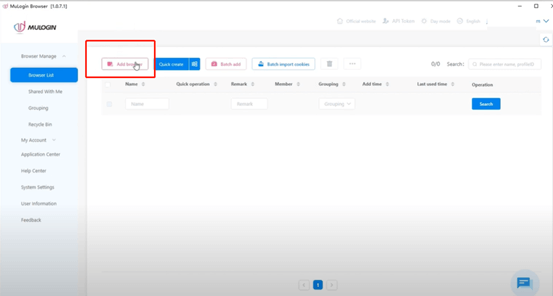
2. After opening the tool, click Add browser.
3. You’ll be placed in the Basic configuration section. Scroll down and click on Proxy settings.
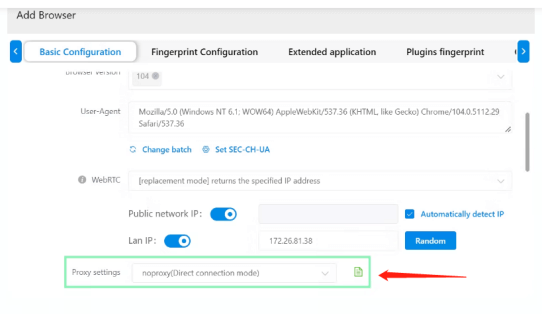
4. Choose HTTP or SOCKS5 and fill in the following information based on your proxies.
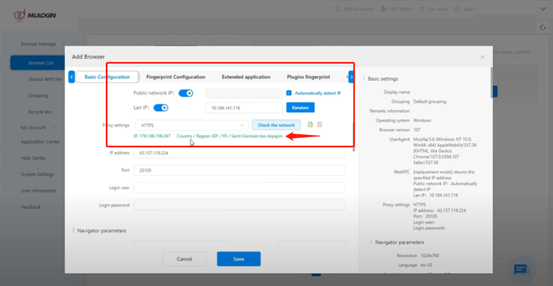
Proxy type: HTTP
IP address: pr.lunaproxy.com
Port: 12233
Login user: customer-custom information
Login password:The lunaproxy user password
5. After entering your information, you can check the network to see if the process works. Detailed IP and country information should be displayed.
6. Lastly, after filling out your proxy information, choose a Display name, scroll down and click save.
And that's it! Your setup is done.
Note: MuLogin does not provide IP proxy services, users need to buy from third-party platforms. Proxy-related tutorials are provided by third-party platforms and have nothing to do with MuLogin. Users are strictly prohibited from using this product to engage in any illegal and criminal activities, and users are responsible for any liability resulting from the use of this product.