9Proxy settings
Step 1: Launch the 9Proxy application and log in to your account.
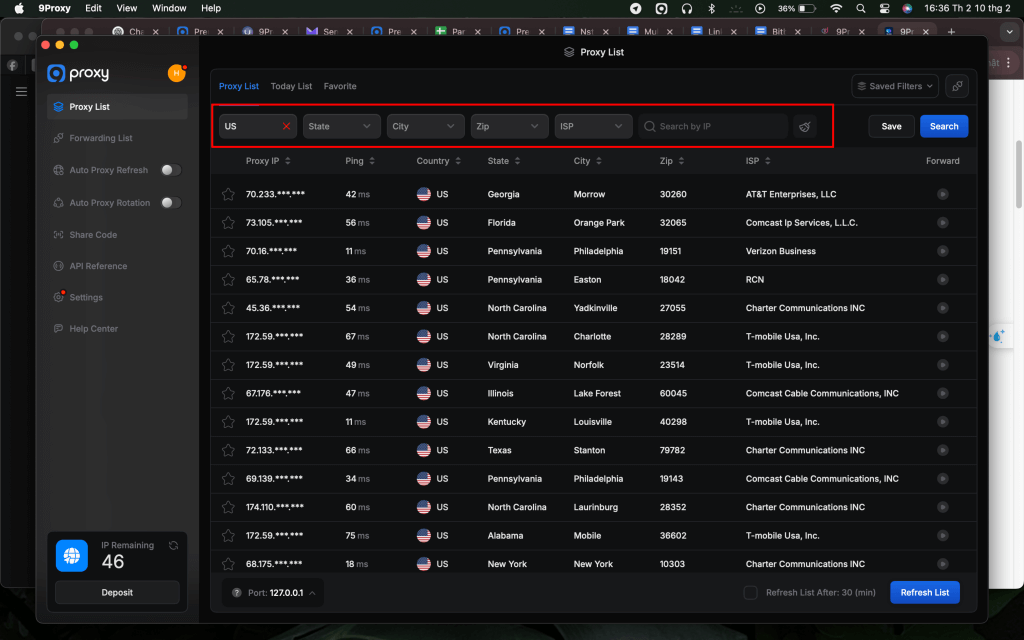
Step 2: Enter the necessary information into sections such as Country, State, ... then click the magnifying glass icon to start searching.
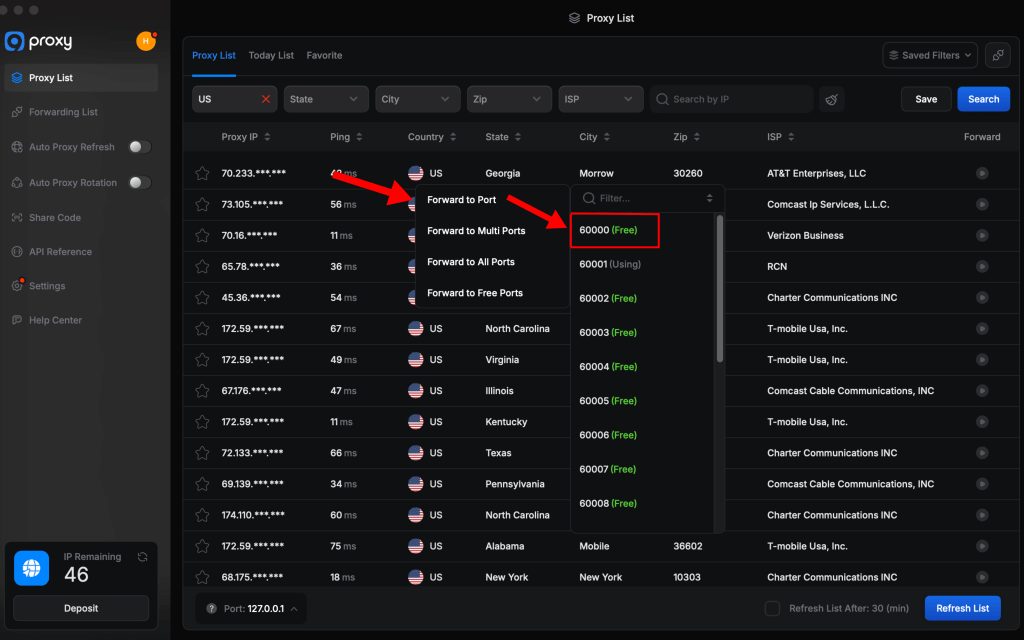
Step 3: Right-click on a proxy from the list to select it. Next, select “Forward Port To Proxy” and then choose a Port number, for instance 60000 from the list that appears afterward.
Step 4: Next, select "Port Forwarding List" to view detailed information regarding the selected proxy.
Step 5: Copy that proxy to prepare for the next installation.

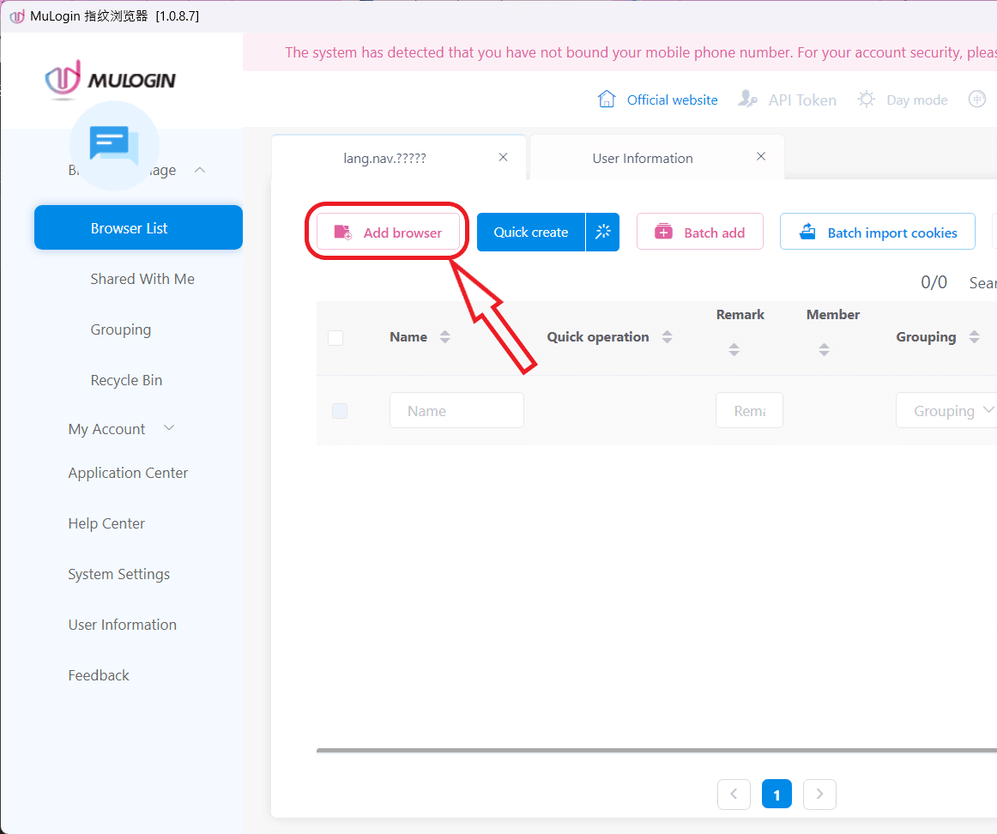
Step 6: Launch the MuLogin and log in to your account.
Step 7: At the main interface of the program, we select Add browser to configure the proxy.
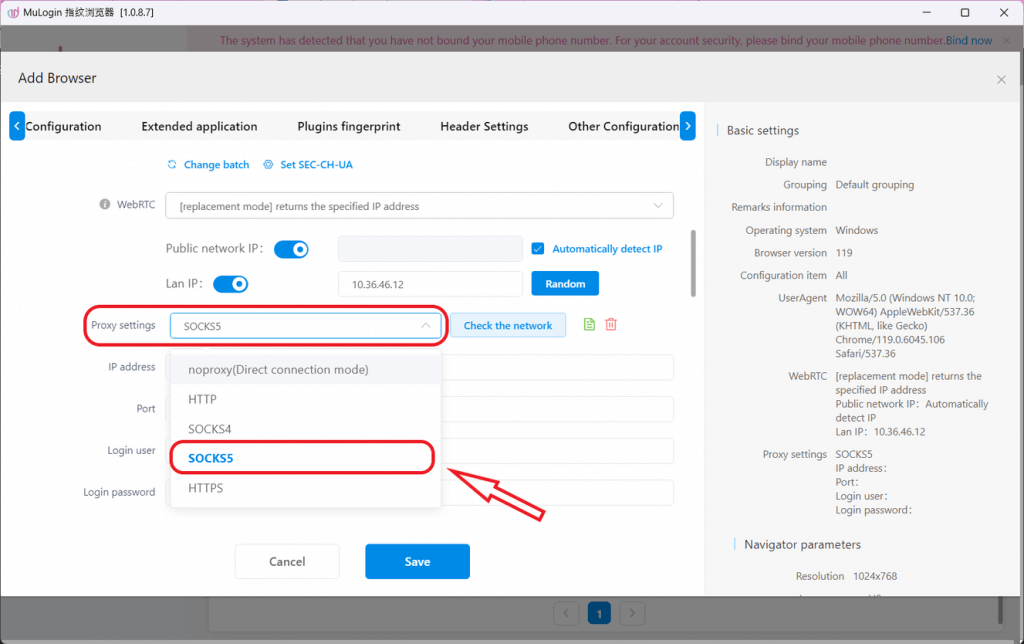
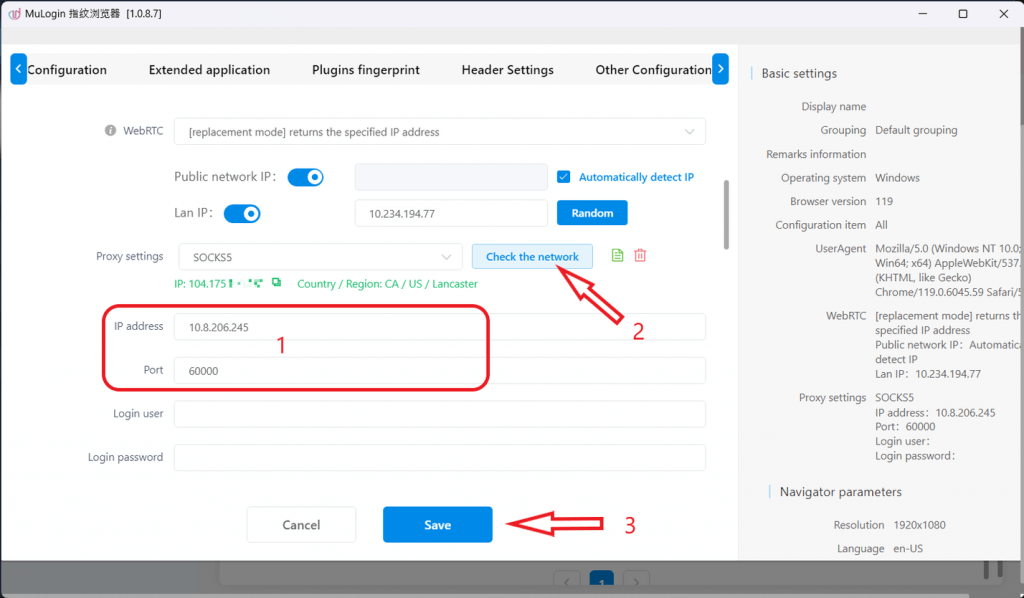
Step 8: Fill in the necessary information and go to the "proxy settings" section, select SOCKS5.
Step 9: Here we paste the proxy we copied earlier, then click "Check the network" to check and finally click Save to complete.
Note: MuLogin does not provide IP proxy services, users need to buy from third-party platforms. Proxy-related tutorials are provided by third-party platforms and have nothing to do with MuLogin. Users are strictly prohibited from using this product to engage in any illegal and criminal activities, and users are responsible for any liability resulting from the use of this product.