MarsProxies settings
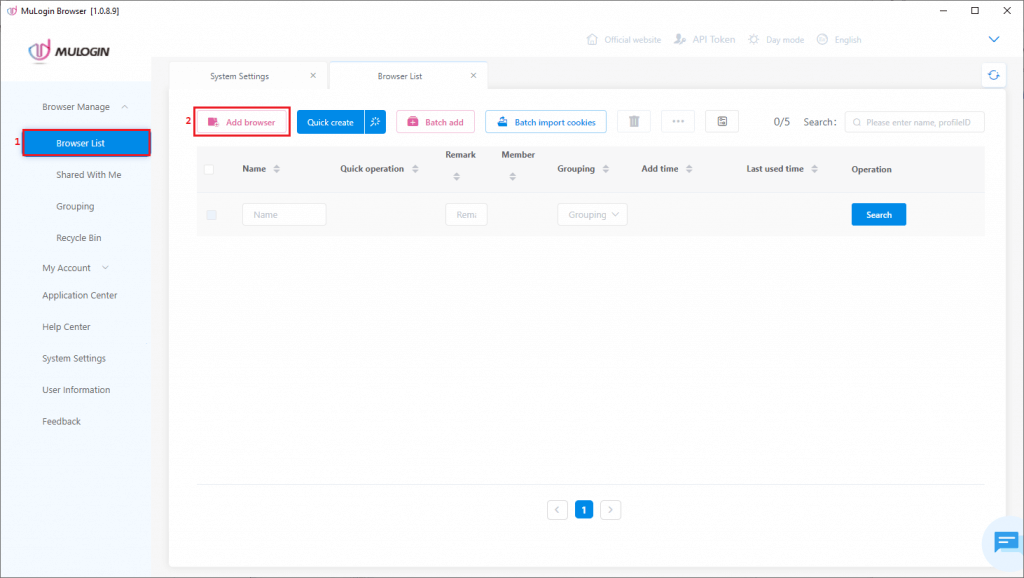
1. To start, download the latest version of MuLogin from the website. Log in and select Browser List (1) from the quick menu. Click the Add browser button (2).
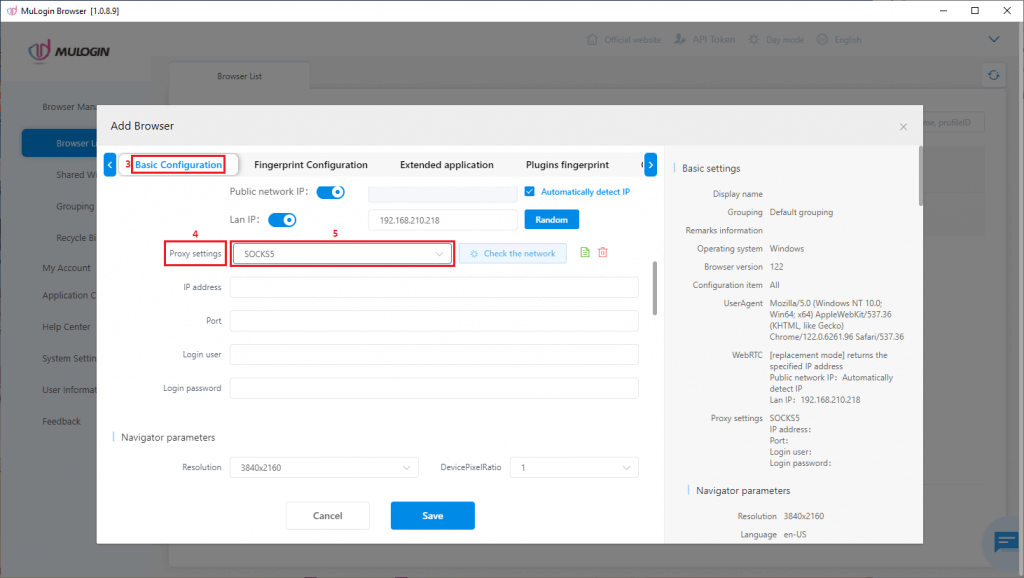
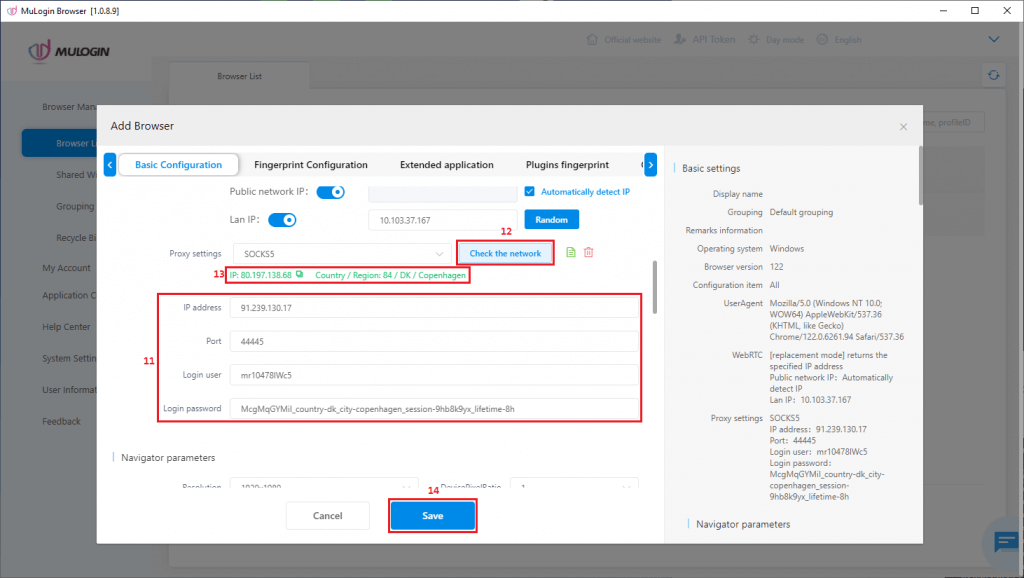
2. In the Basic Configuration tab (3), scroll down to Proxy settings (4). MuLogin supports HTTP, HTTPS, SOCKS4 and SOCKS5 proxies, so select the type (5) you want to use. We’ll go with SOCKS5.
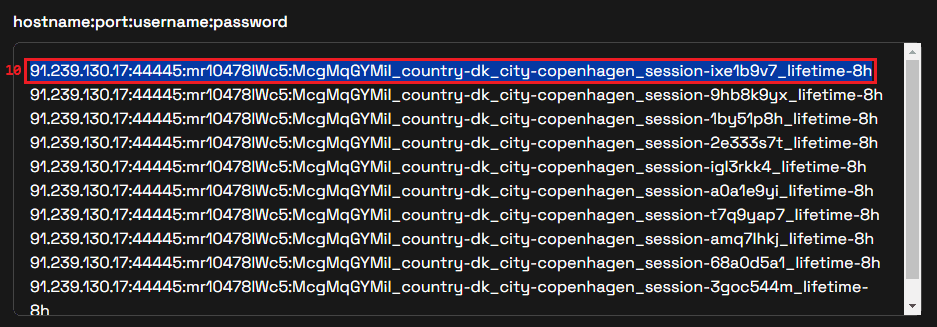
3. Now it’s time to get your proxy credentials from the MarsProxies dashboard. We’ll use our Ultra residential proxies in Copenhagen, Denmark (6), with sticky rotation (7), SOCKS5 protocol (8), and a session duration of 8 hours (9).
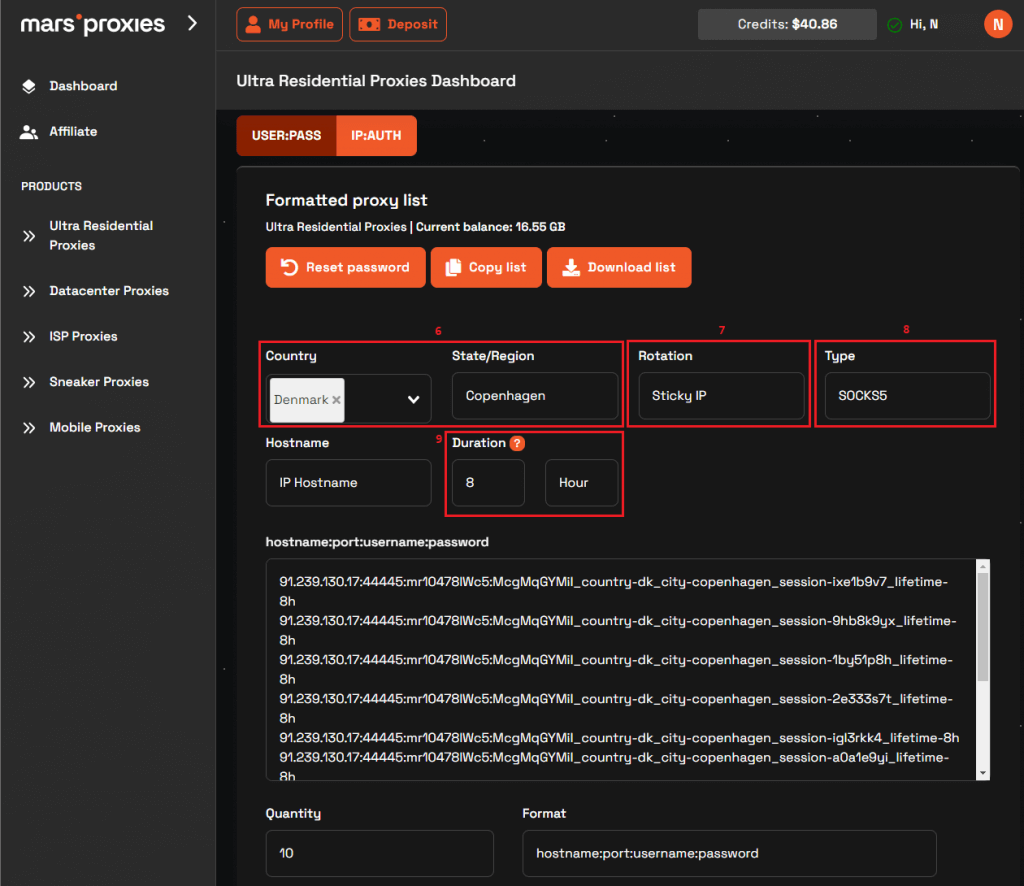
4. Once you configure your proxies, select any string of credentials (10) from the MarsProxies dashboard. It contains your hostname (or IP address), port, username, and password separated by colons.
5. Copy this information over to MuLogin (11) and click the Check the network button (12) to get some additional information about your proxy. You’ll get some additional information (13) about your proxy server. Once you’re done configuring other aspects of your browser profile, click the Save button (14).
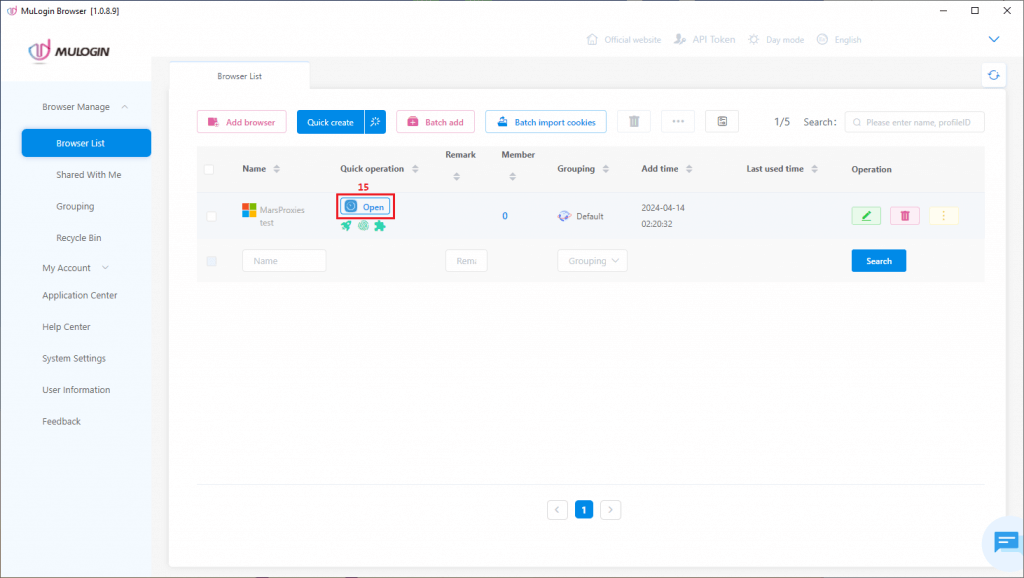
6. Now it’s time to launch your newly created browser profile by clicking the Open (15) button.
7. A browser will launch with your settings. You can visit any fingerprint-checking website to make sure everything works correctly.