Dove proxy settings
1.Open the Dove Proxy website -> Click the "Login" or "Register" button -> Log in to the Dove Proxy dashboard; You can also refer to the related video tutorial.
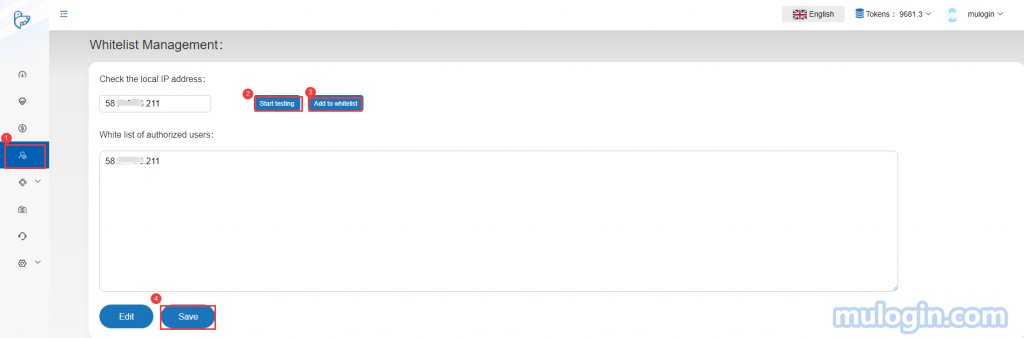
2.Click "Whitelist Management" in the left navigation bar -> Click the "Start testing" button to detect the local IP address -> Click "Add to Whitelist" or manually enter the local IP of the computer you are using, and fill in the " White list of Authorized users" list -> Click "Save".
3. Create proxy IP, there are two method:
1.Select "Channel Management" to set IP proxy:
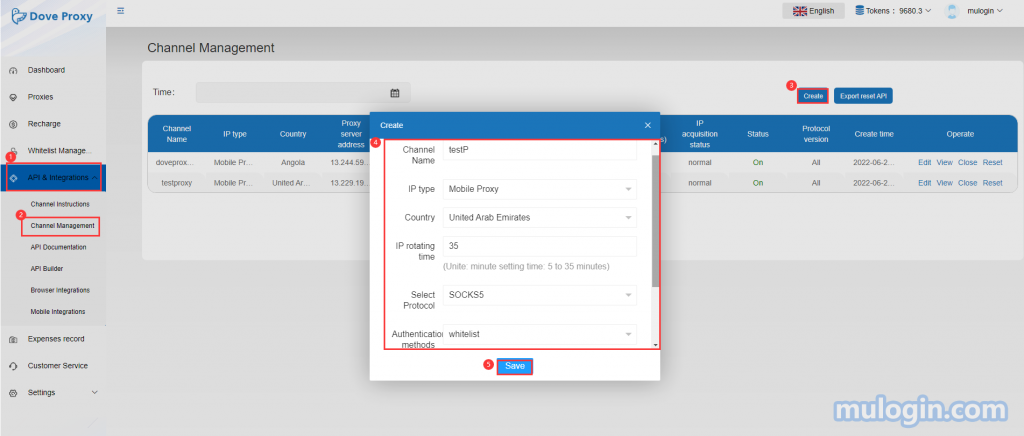
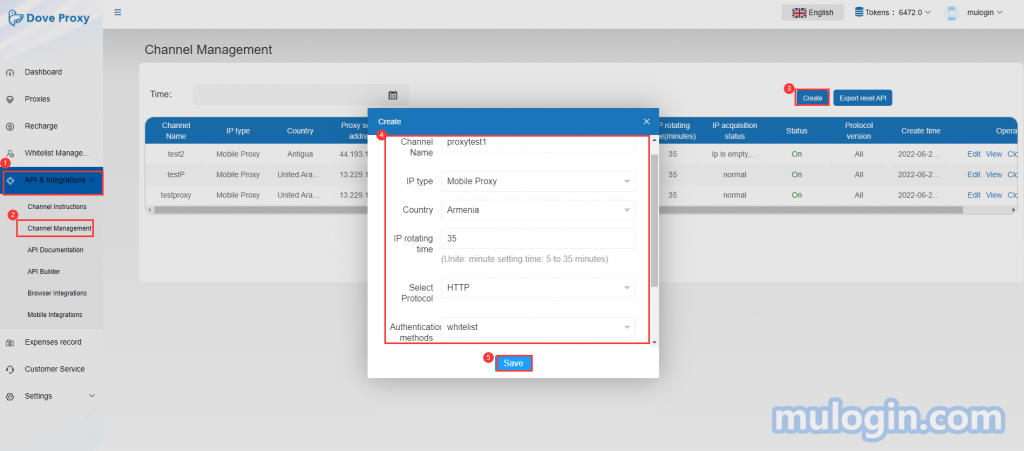
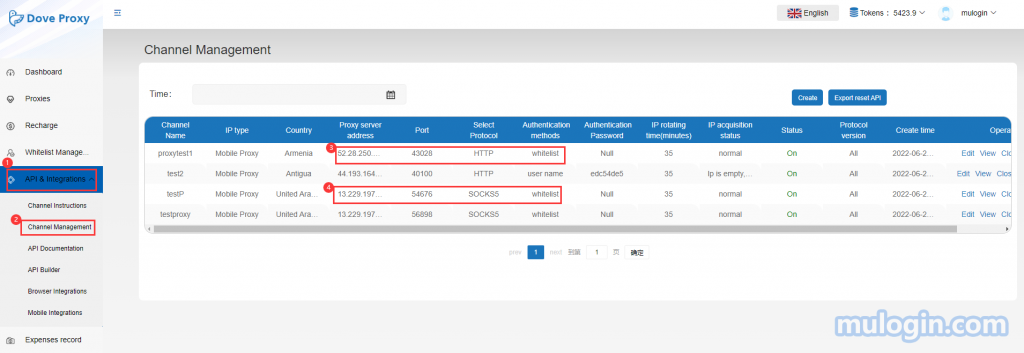
Click "API and Integrations" -> Click "Channel Management" -> Click "Create"button to create the channel:
1)Channel Name:Set channel name as needed, there is no special restrictions;
2)IP type:Dynamic Residential or Mobile IPs;
3)Country:The countries available for channel creation are displayed here; if no country that you need, it means that the country is not available for channel creation;
4)IP rotating time:Set the time for rotation by minutes, which can only be set with integers;
5)Select Protocol:Select HTTP protocol or SOCKS5 protocol, it’s recommended to use SOCKS5 for the users in China;
6)Authentication modes: There are two modes for the whitelist and the username modes; Whitelist mode: Whitelisting the IP address of the device/s to the " white list of Authorized users" list; Username mode: Using username and password to use the proxy. (HTTP type can only be used in an overseas environment or an overseas V.P.S. The users who cannot use the HTTP type even if the V.P.N is enabled globally in China).
7) Protocol version: “All”, “IPv4” or “IPv6” can be selected, it is generally recommended to select “All”;
8) Save.
2.Select the "API Builder" method to set the proxy IP:
Click "API and Integrations" -> Click "API Builder" to enter the IP creation page:
1) Proxy verification method: select " use username" or "use IP Whitelist", it’s recommended to choose “ use IP Whitelist” for the users in China;
2) IP type: Currently, only "Mobile Agent" is supported, and "Dynamic Residential" IP needs to select the first method above to add a channel;
3) Proxy location: select the appropriate proxy country or city;
4) Service duration:Set the time by minutes, which can only be set with integers;
5) Select Protocol:Select HTTP protocol or SOCKS5 protocol, it’s recommended to use SOCKS5 for the users in China;
6) Output format: "Interface" is in json format. Generally, it is recommended for ordinary users to select "Text" format, because after opening the generated API link, you can directly copy ip,port, and then paste it directly into the proxy settings of MuLogin Pages, more convenient, no need to copy and paste them one by one;
7) Get quantity: fill in the number of IPs you want to create, an integer within 1-10;
8) Click "Simulation of Proxy Generator " to generate an API link;
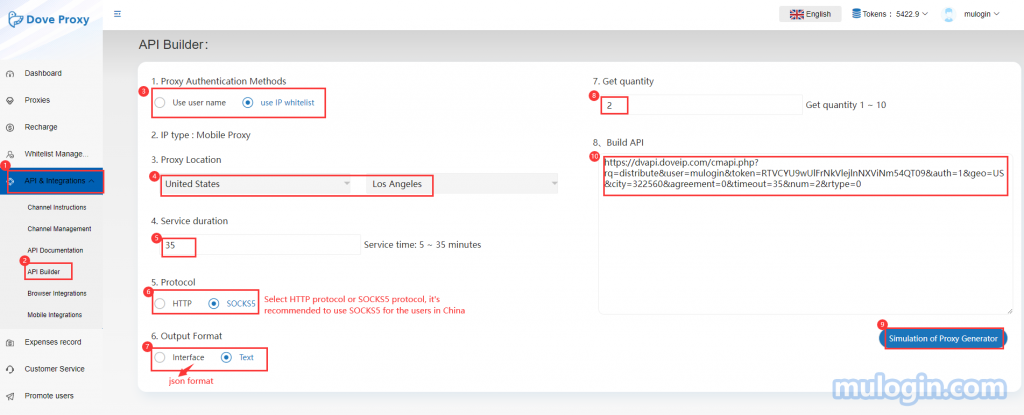
9) Copy the generated API link and paste it into the browser to open, you can view the related information of generated proxy IP ;

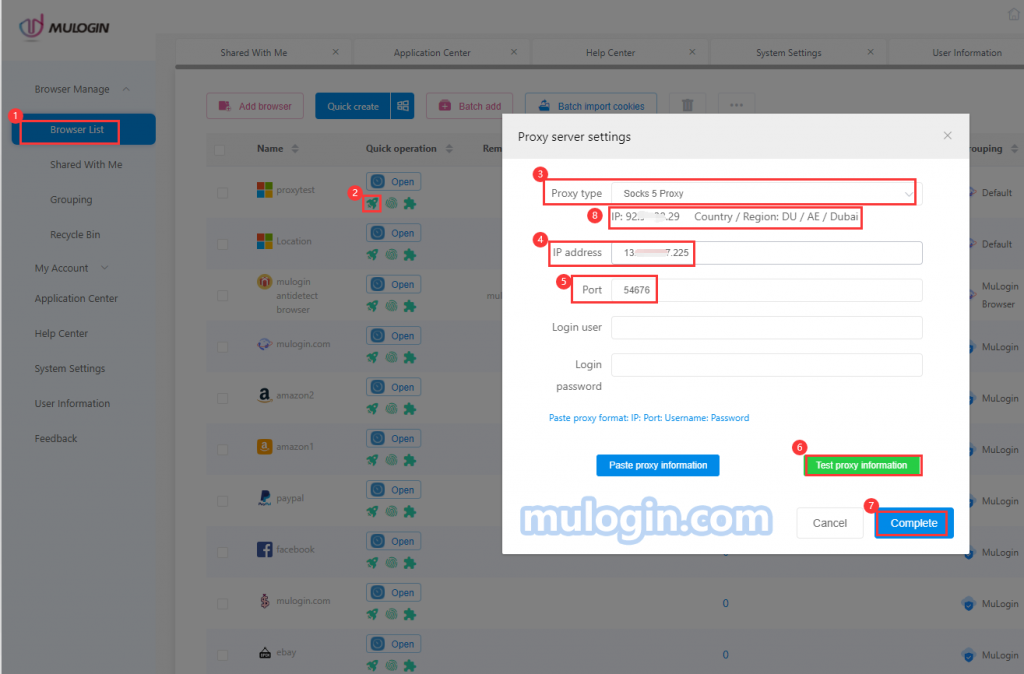
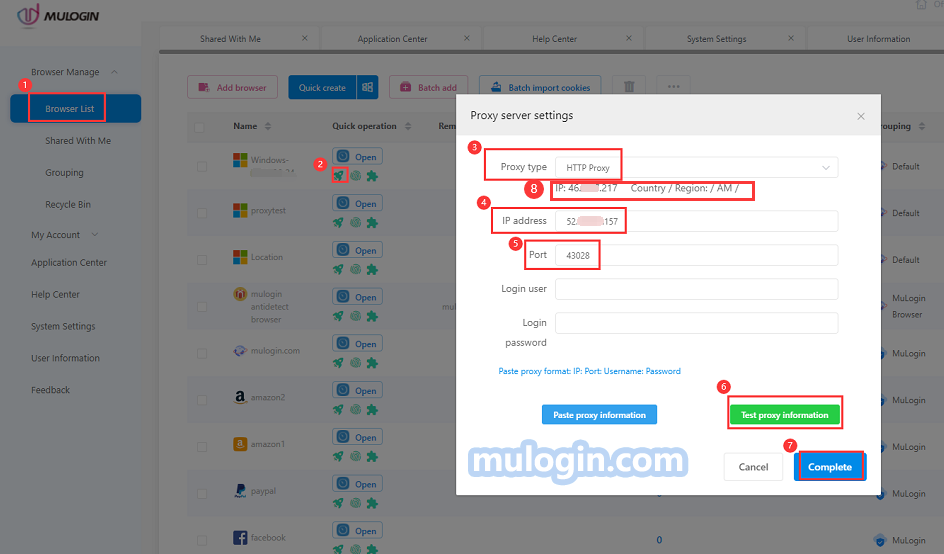
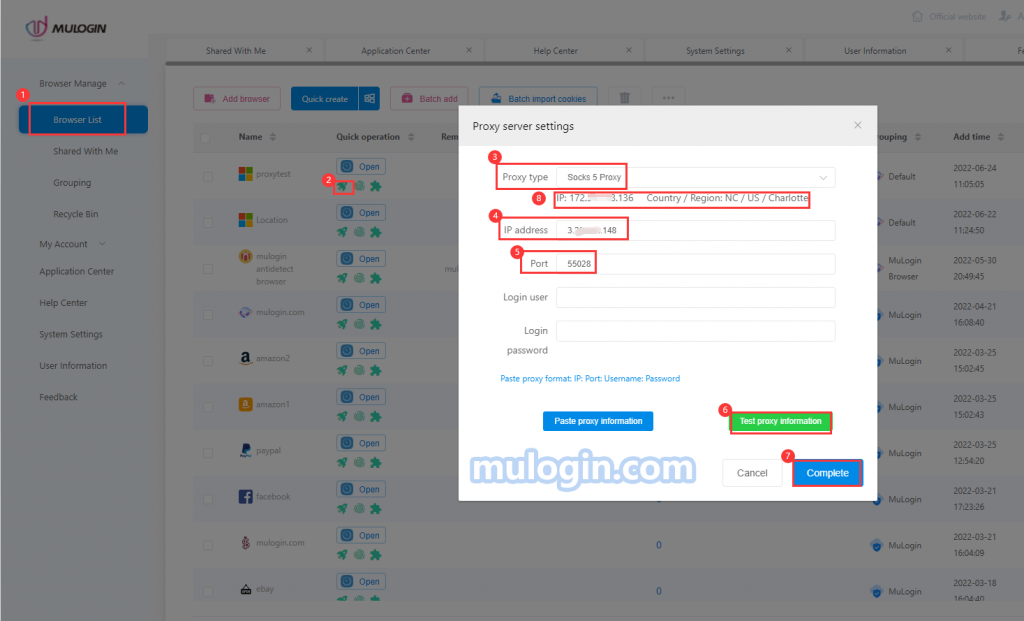
4. Open the MuLogin client (new users can contact customer service to get a three-day trial);
5. Click "Add Browser" or select the icon ![]() under "Created Browser";
under "Created Browser";
6. Select the proxy type corresponding to the IP (HTTP or SOCKS5);
7. Enter IP, port;
8. Click "Test Proxy Information", after the test is successful, click "Complete" to save and open the browser for use;
Note: MuLogin does not provide IP proxy services, users need to buy from third-party platforms. Proxy-related tutorials are provided by third-party platforms and have nothing to do with MuLogin. Users are strictly prohibited from using this product to engage in any illegal and criminal activities, and users are responsible for any liability resulting from the use of this product.