SOAX proxy settings
1. Open and log in to SOAX website user background.You can also refer to the related video tutorial.
2. Download and install MuLogin client. (New users can get 3 days free trial.)
3. Set up multiple ports, open multiple browsers at the same time.
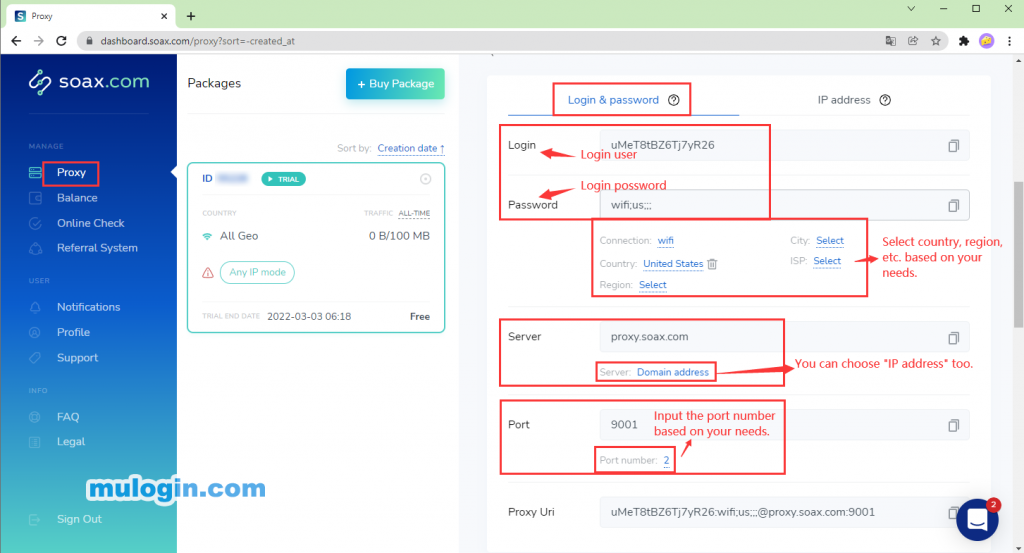
A. Create multiple ports by using Login & password setting method.
Login -> Password -> Server -> Enter the number of ports. As shown below:
Note:
① Login: Login = user's name in SOAX system, so-called name of the package, but not its type.
② Password: Password represents the geographical parameters of the proxy IP, such as connection type, country, region, city, and provider. These parameters are separated by ";". You can also choose to separate them with “_” after exporting them.
③ Server: Select "Domain address" or "IP address" based on your own needs, it is recommended to select "Domain address".
④ Port: The ports are 9000, 9001, …, the number of ports depends on the number of ports available in the user’s package, set the number of ports based on your own needs. If the number is set 10, it will allocate 10 IPs to these ports at the same time.
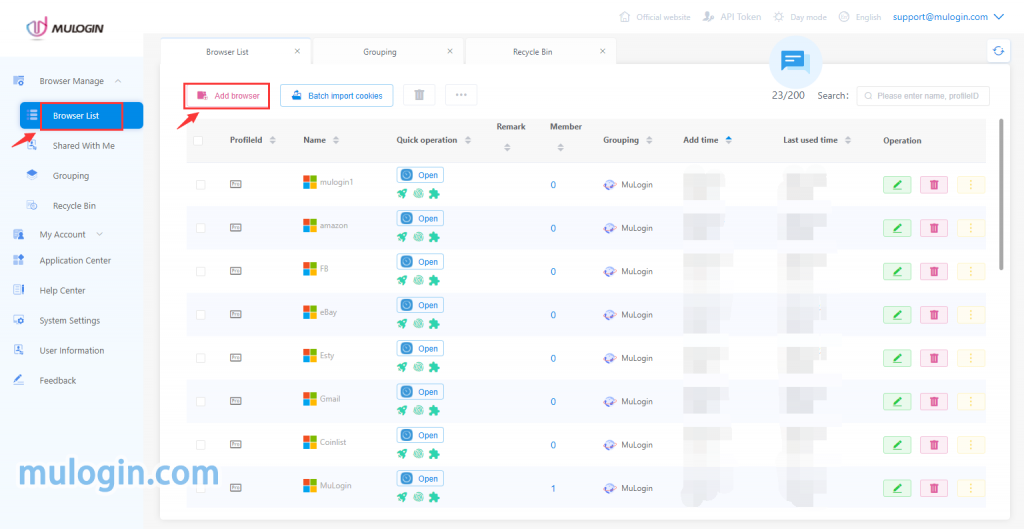
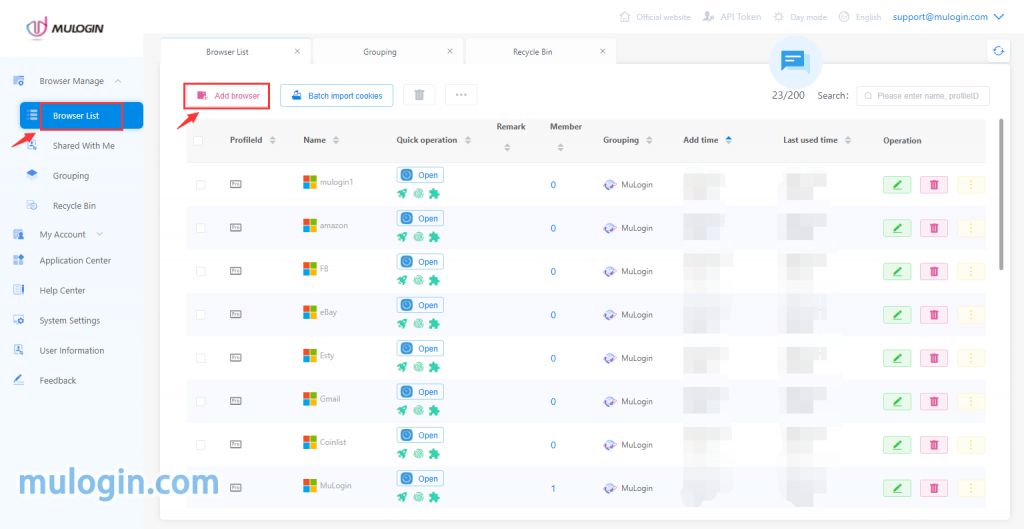
4. Open MuLogin client -> Browser Manage -> Browser List -> Add browser
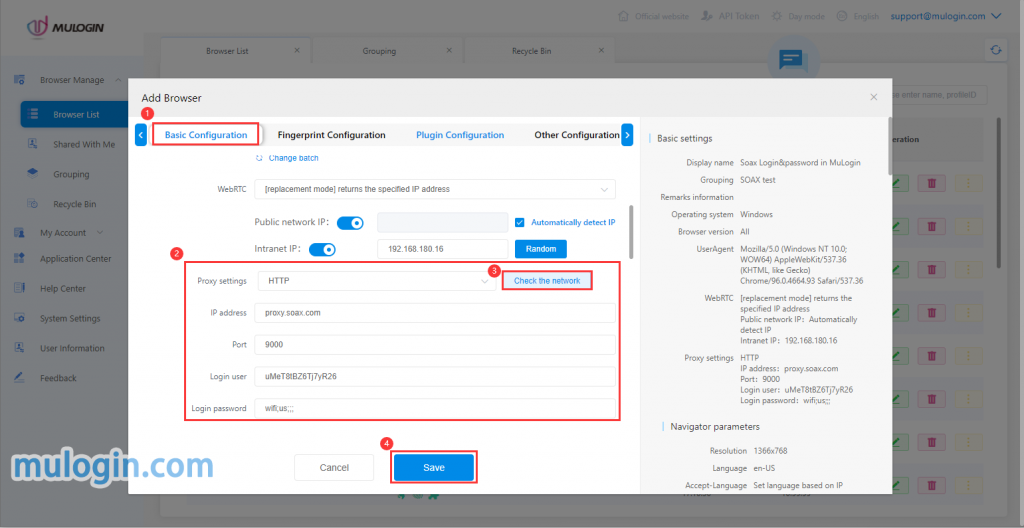
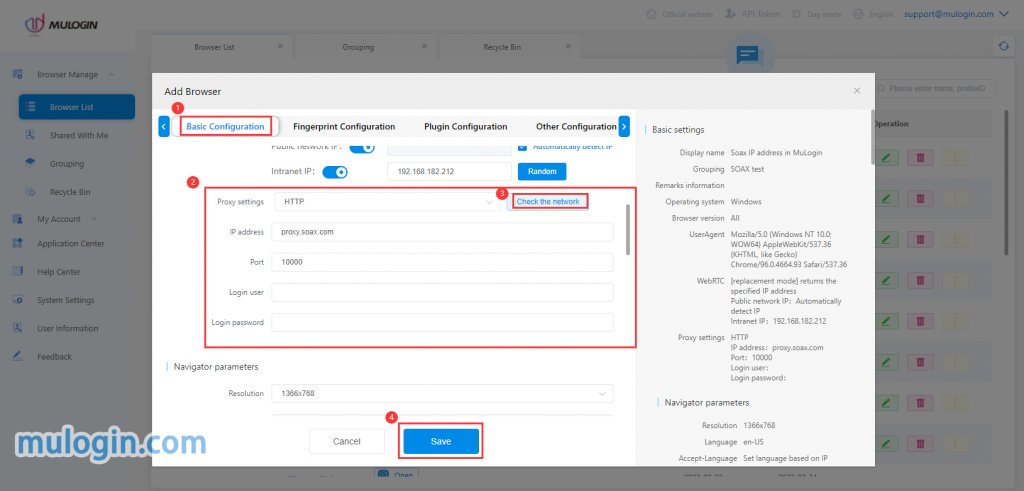
5. Basic configuration -> Proxy settings, input the following information
Proxy type: HTTP Proxy (You can also choose SOCKS 5 as the proxy type)
IP address: proxy.soax.com (You can also select “IP address”, then input here)
Port: 9000 (If set multiple ports, fill in ports such as 9001, 9002, etc. in other configuration files)
Login user: Login content on SOAX
Login password: Password content on SOAX
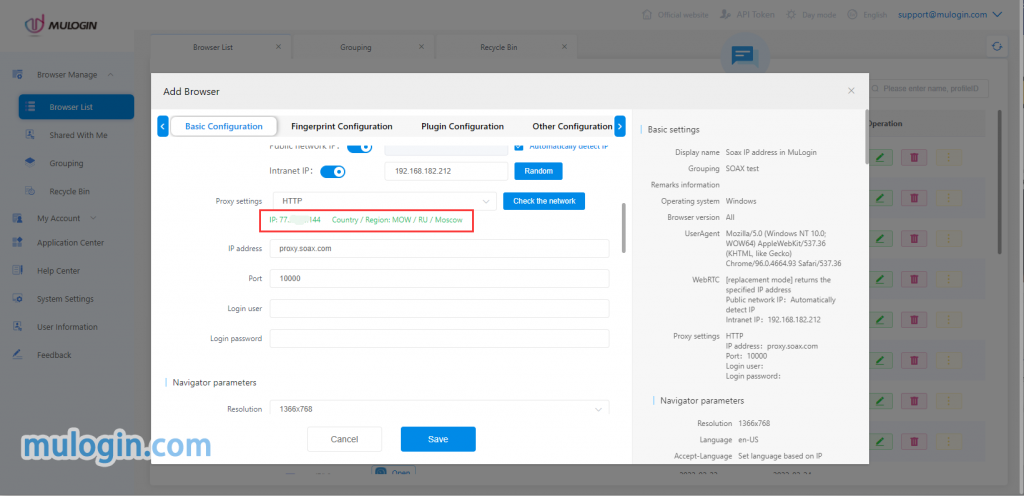
Click "Check the network" button to check proxy connection status, after successful test, click "Save" to save the settings.

B. Create multiple ports by using the IP address setting method.
1. Add your IP address to the whitelist. IP whitelist -> Check your IP -> Save
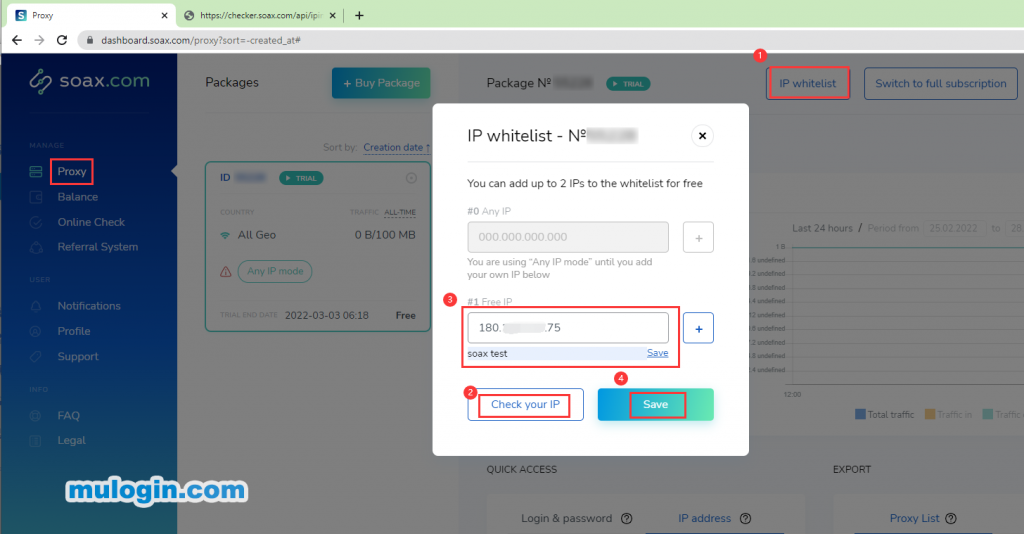
2. Add Filter -> Select the desired country, region, etc. -> Enter the number of ports -> Save
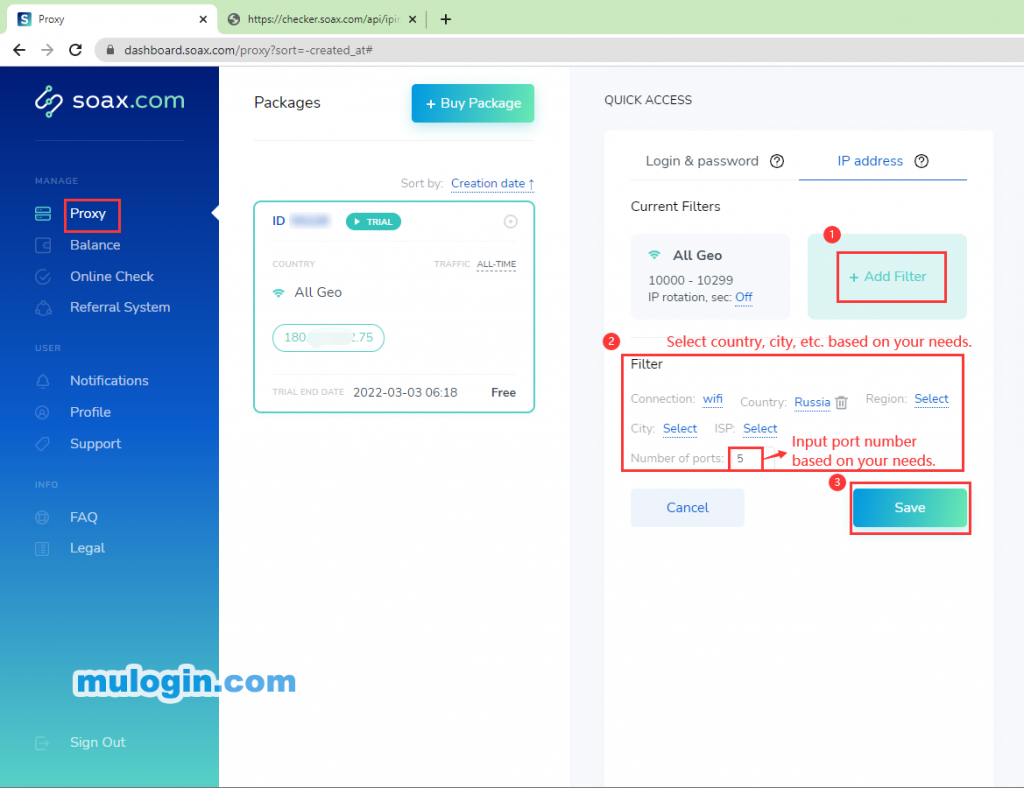
Note:
The ports are 10000, 10001, …, the number of ports depends on the number of ports available in the user’s package, set the number of ports based on your own needs. For example, if the number is set 10, it will allocate 10 IPs to these ports at the same time.
3. Open MuLogin client -> Browser Manage -> Browser List -> Add browser
4. Basic configuration -> Proxy settings, enter the following information
Proxy type: HTTP Proxy (you can also choose SOCKS 5 as the proxy type)
IP address: proxy.SOAX.com ("IP address" can also be selected)
Port: 10000 (if multiple ports are set, fill in ports such as 10001, 10002, etc. in other configuration files)
Login user: leave blank
Login password: leave it blank
Click "Check the network" button to check proxy connection status, after successful test, click "Save" to save the settings.
Note: MuLogin does not provide IP proxy services, users need to buy from third-party platforms. Proxy-related tutorials are provided by third-party platforms and have nothing to do with MuLogin. Users are strictly prohibited from using this product to engage in any illegal and criminal activities, and users are responsible for any liability resulting from the use of this product.