Proxy-cheap settings
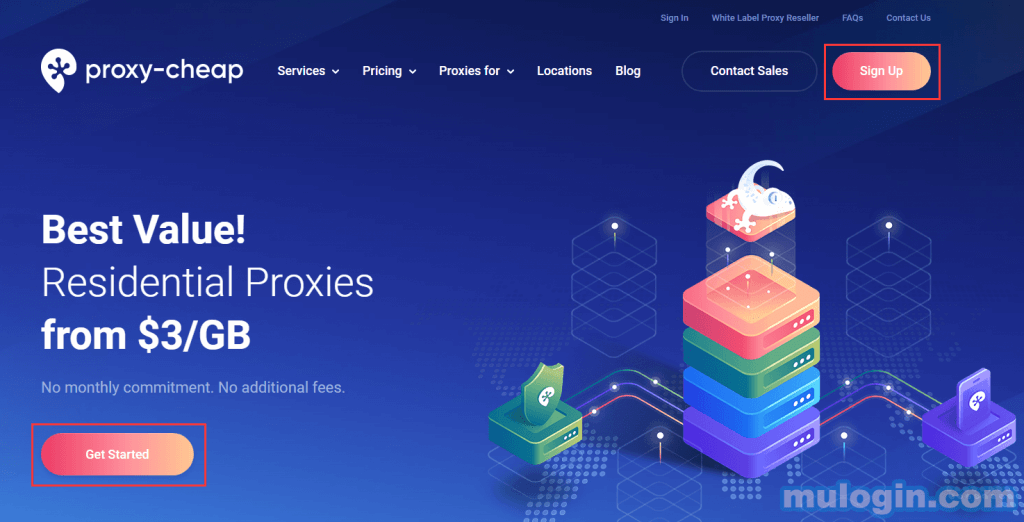
1. Open the official website of proxy-cheap, click "Get Started" or "Sign Up" to register your account.
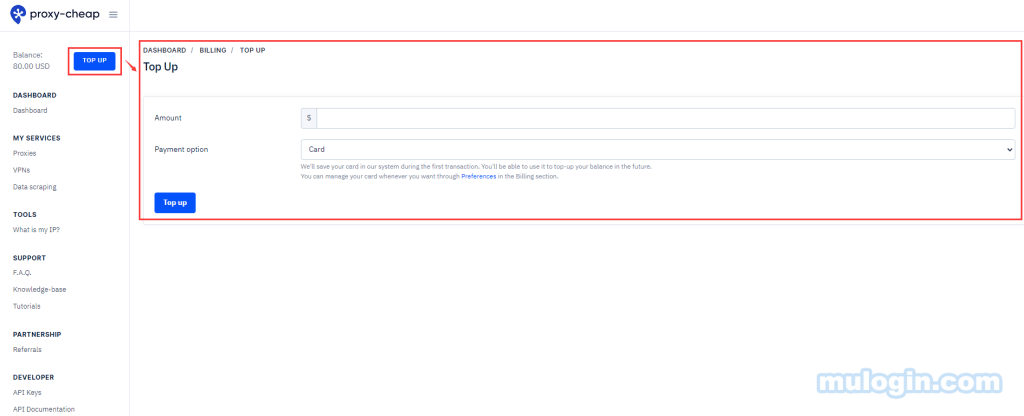
2. Log in to the dashboard, click " TOP UP", choose the recharge amount and payment option, and click the "Top up" button below to recharge.
3. Click "Proxies" under "MY SERVICES” and select the required proxy type (Datacenter proxy/Static residential proxy/Residential proxy/Mobile proxy).
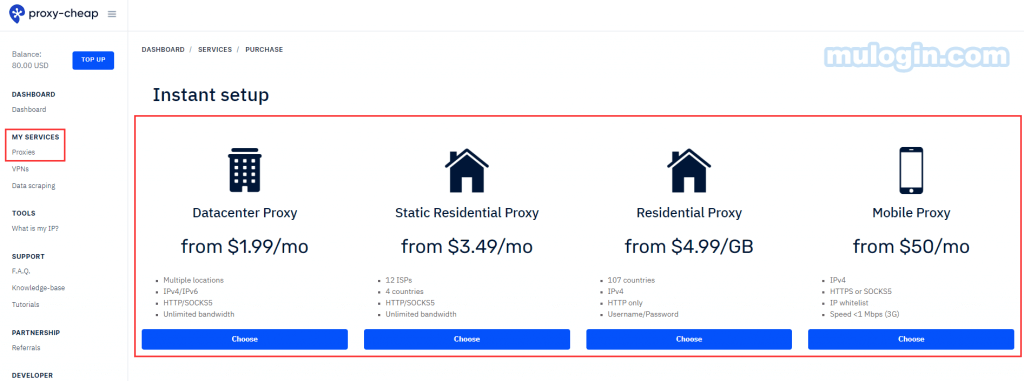
4. On the purchase page, select the IP version, country, protocol, authentication type, package, quantity, months, etc., and click "Buy" to purchase the proxy.

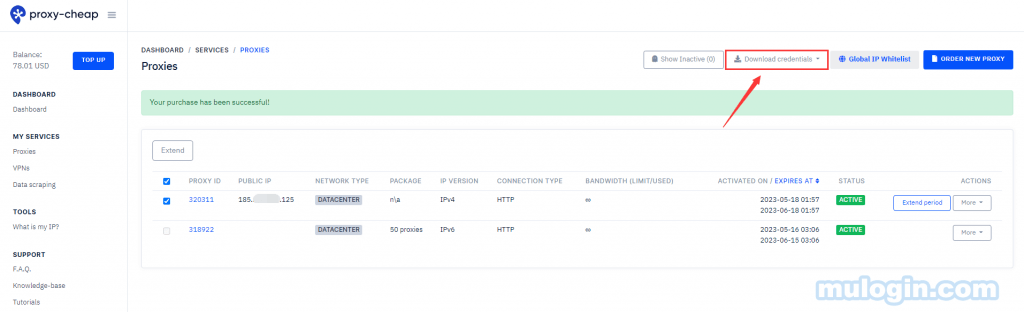
5. After purchase, check the purchased IPs in "Proxies", if you want to download the IPs directly, you can check the desired IPs and click "Download credentials".
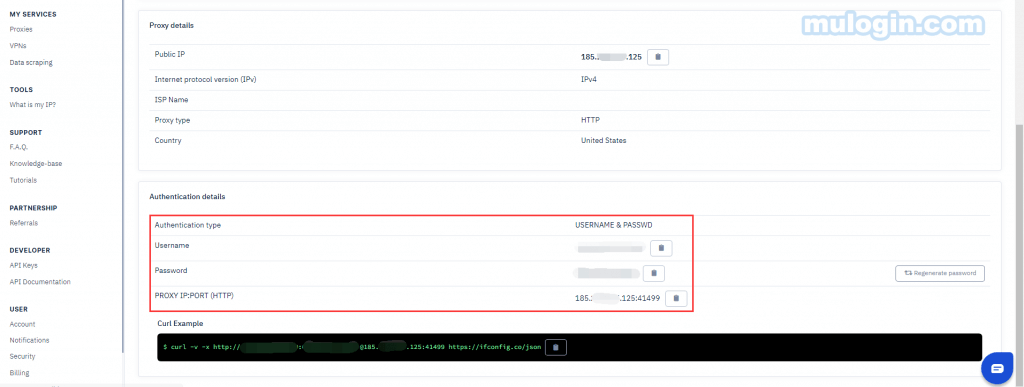
6. Or click on the IP to enter the details page, check and copy the IP information.
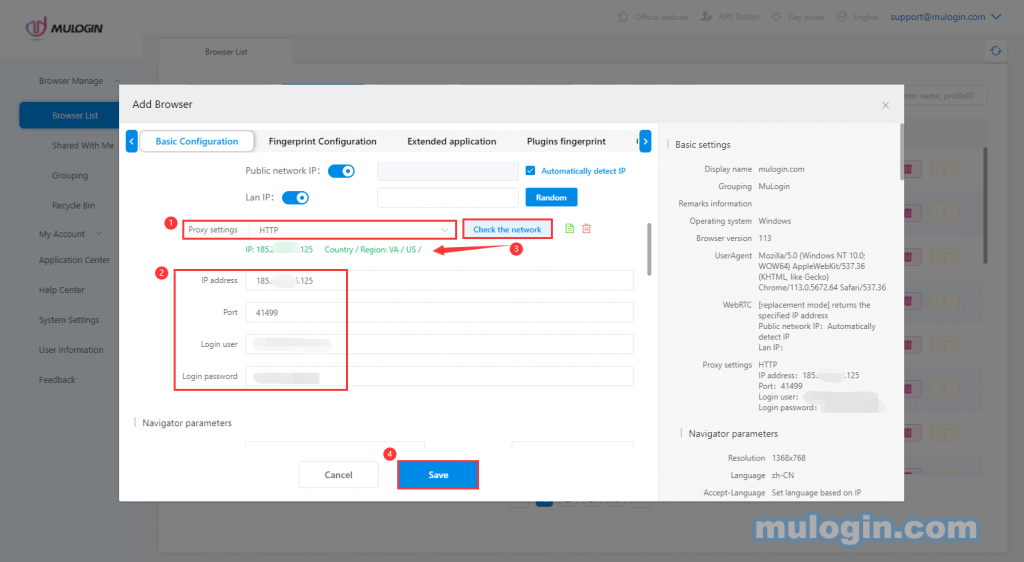
7. Open MuLogin client-> Add browser-> Select proxy type-> Paste proxy information-> Check the network-> Save, then you can open the browser and use it.
Note: MuLogin does not provide IP proxy services, users need to buy from third-party platforms. Proxy-related tutorials are provided by third-party platforms and have nothing to do with MuLogin. Users are strictly prohibited from using this product to engage in any illegal and criminal activities, and users are responsible for any liability resulting from the use of this product.