Coronium proxy settings
1. Register or log in to the Coronium dashboard. You can also refer to the related video tutorial.
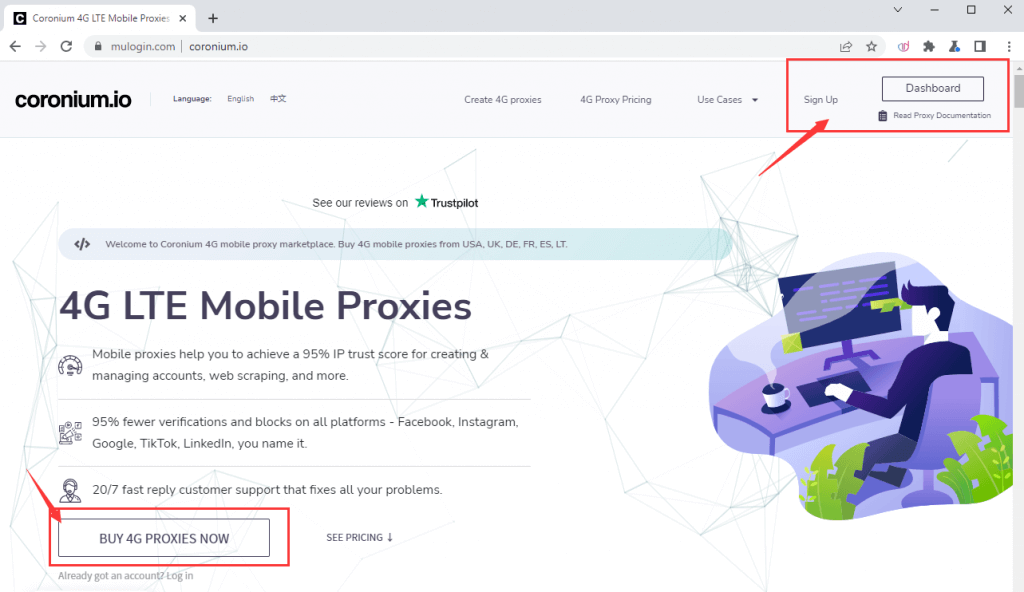
2. Click "Add New Proxies". Select the country, carrier, region, and time of use, and then click to pay for the selected IP.

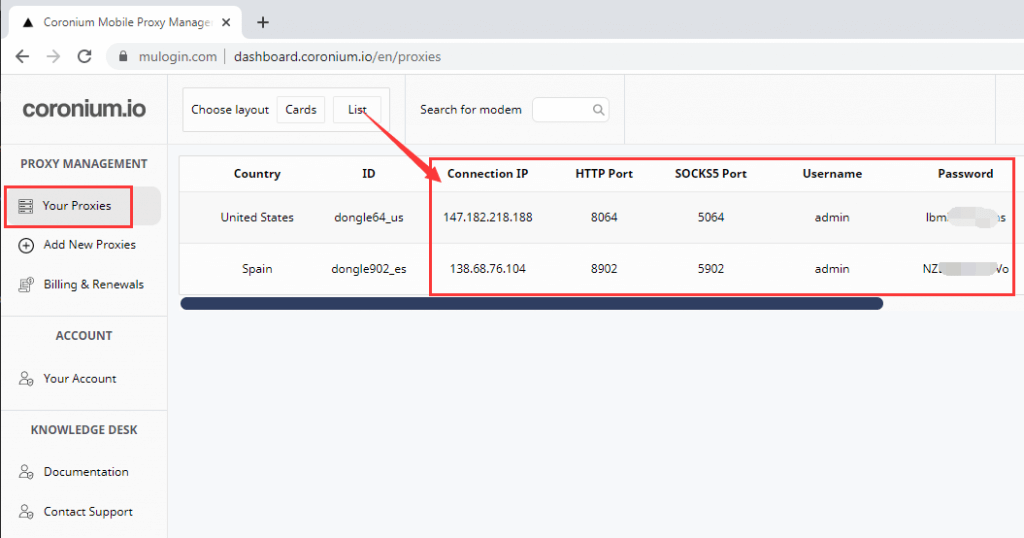
3. Click "Your Proxies", you can see the country, IP, port, username, password, and other information of your purchase.
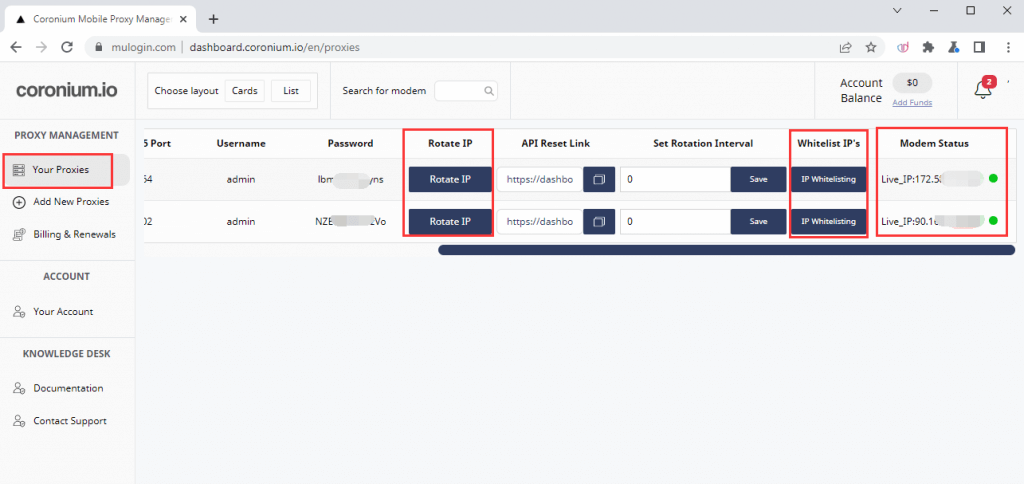
4. Click "Rotate IP" to update the current IP. Click " IP Whitelisting" to add the local IP of the computer to authorize the use of the proxy (choose to fill in or not according to your needs), "Modem Status" is the real export IP you are using.
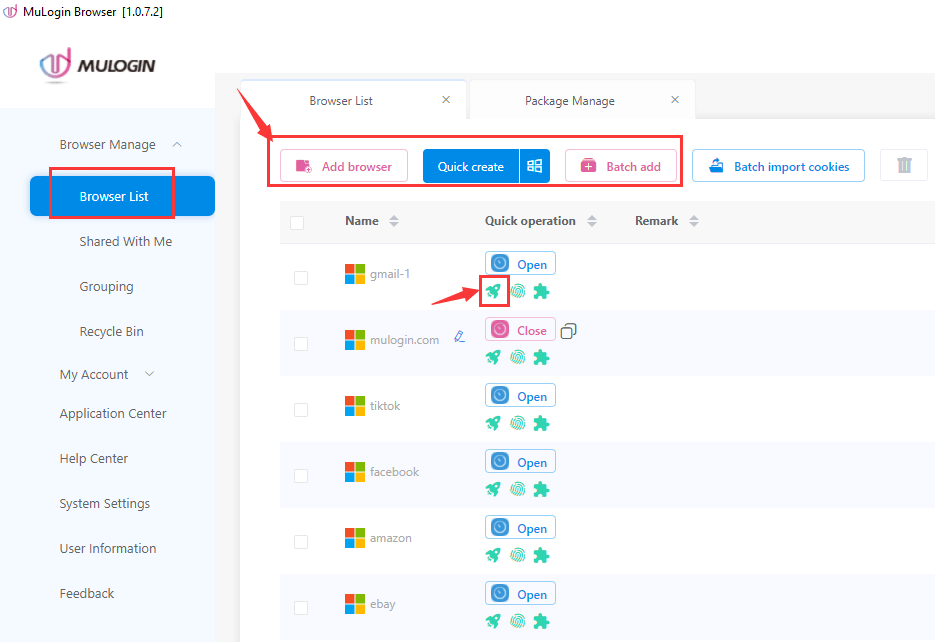
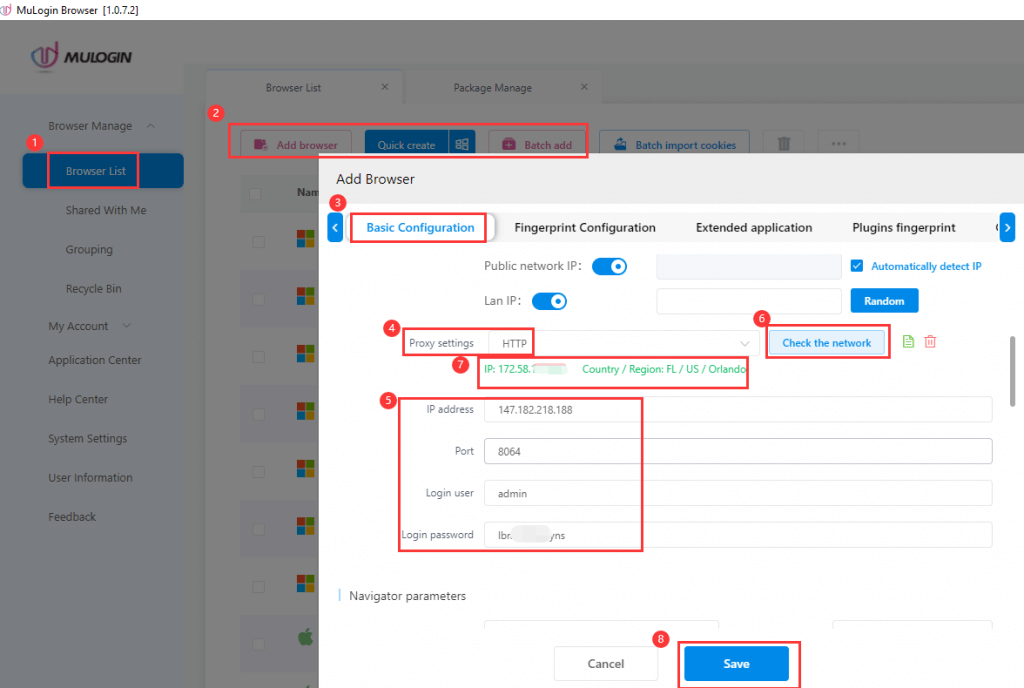
5. Open MuLogin client (New users can contact customer service for a three-day trial).
6. Click on "Add Browser" or select the icon![]() below "Created Browser".
below "Created Browser".
7. Select the proxy type corresponding to the IP (HTTP or SOCKS5), and enter the IP:Port:Username:Password (Figure 3 to view the relevant information).
8. Click “Check the network” and click "Save" to save after successful testing, then you can open the browser to use.
Note: MuLogin does not provide IP proxy services, users need to buy from third-party platforms. Proxy-related tutorials are provided by third-party platforms and have nothing to do with MuLogin. Users are strictly prohibited from using this product to engage in any illegal and criminal activities, and users are responsible for any liability resulting from the use of this product.