Rapidproxy settings
Setup Guide for Rotating Proxies
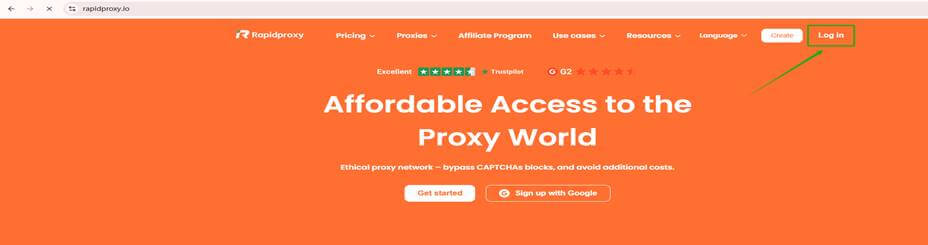
Step 1: Log in to the RapidProxy website
Go to Rapidproxy website and click【Log in】.Free test | Traffic never expires
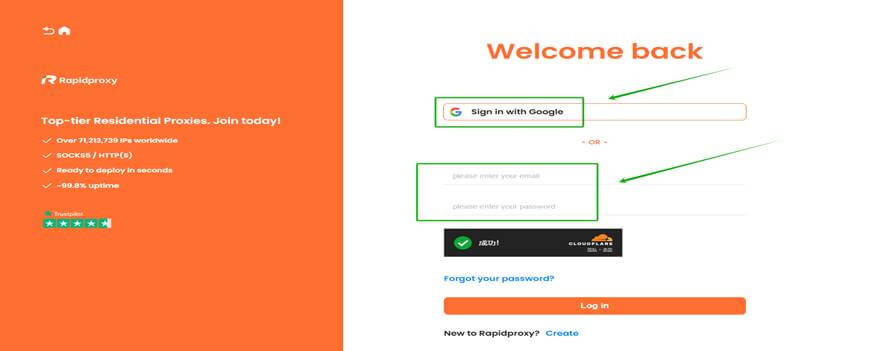
There are two login methods:
- Sign in with Google
- Log in with email and password
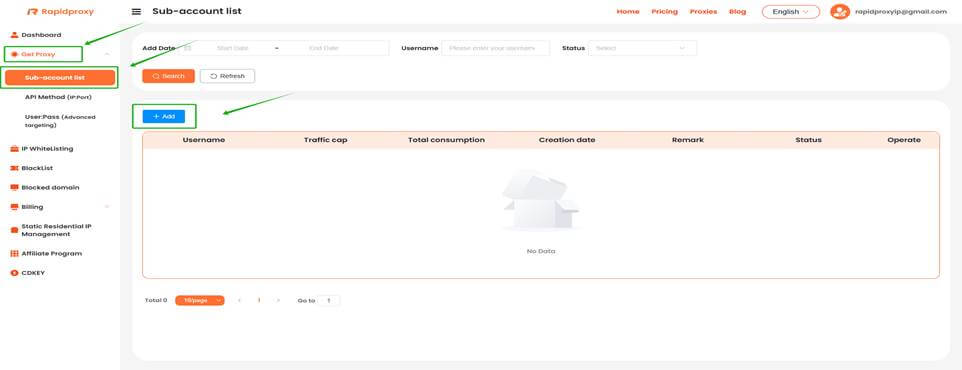
Step 2: Go to the dashboard
After logging in, go to the RapidProxy dashboard and click:
【Get Proxy】 → 【Sub-account list】 → 【+Add】
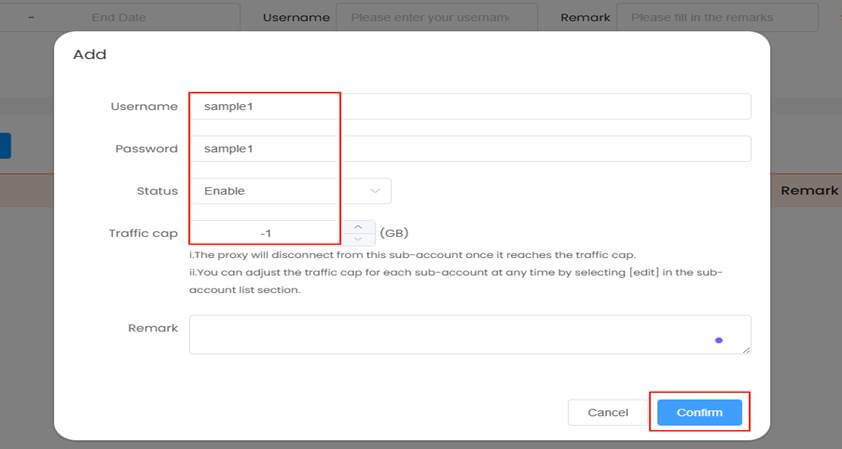
Step 3: Enter sub account information
In the pop-up window, fill in the following:
- username:2 to 12 letters and numbers
- password:4 to 12 letters and numbers
- Set Status to 【Enable】
- Traffic cap (GB): enter【 -1 】for unlimited traffic
Then click 【Confirm】 to save the sub account.
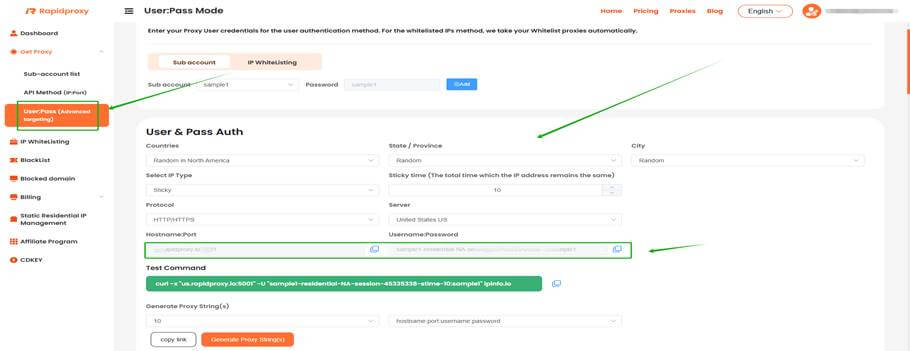
Step 4: Configure proxy parameters
- Go to the【User:Pass (Advanced targeting)】 page.
- Configure proxy parameters as needed, including specifying country/region, rotation interval, proxy protocol, etc.
- Copy the proxy information generated by Rapidproxy and import it into your proxy software for use.
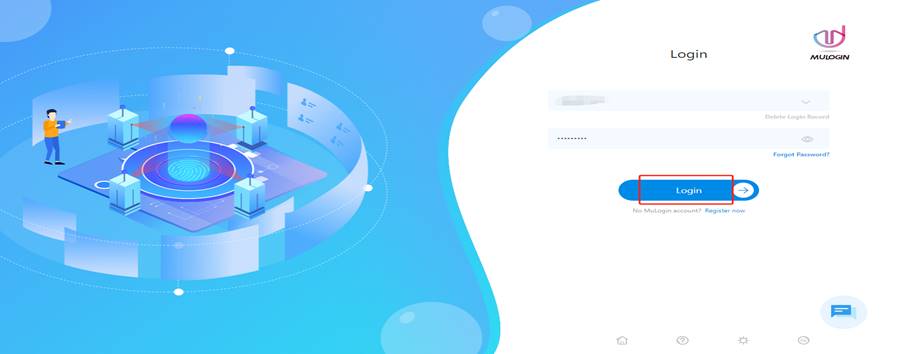
Step 5: Log In MuLogin browser
Open the MuLogin browser and click【Login】to access your account. Support 3-day Free Trial.
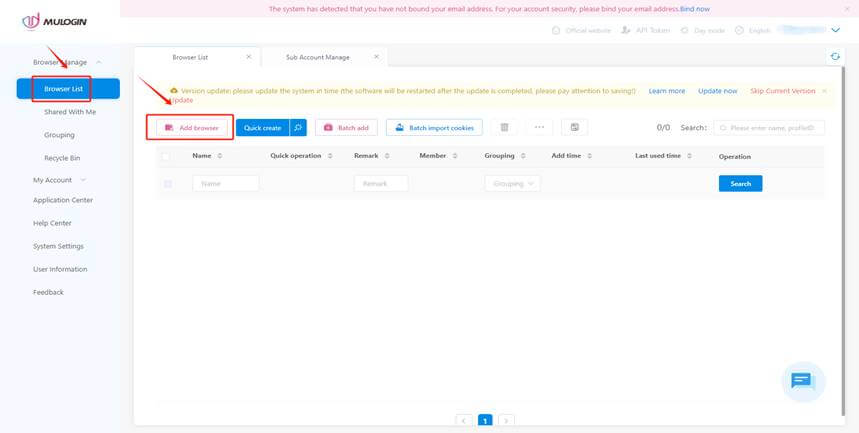
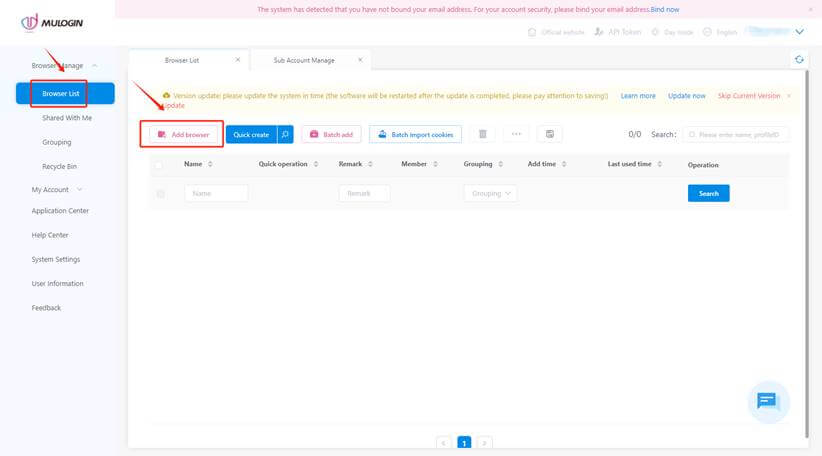
Step 6: Create a New Proxy Configuration
Navigate to 【Browser Manager】 — 【Browser List】 — 【Add Browser】 to create a new profile.
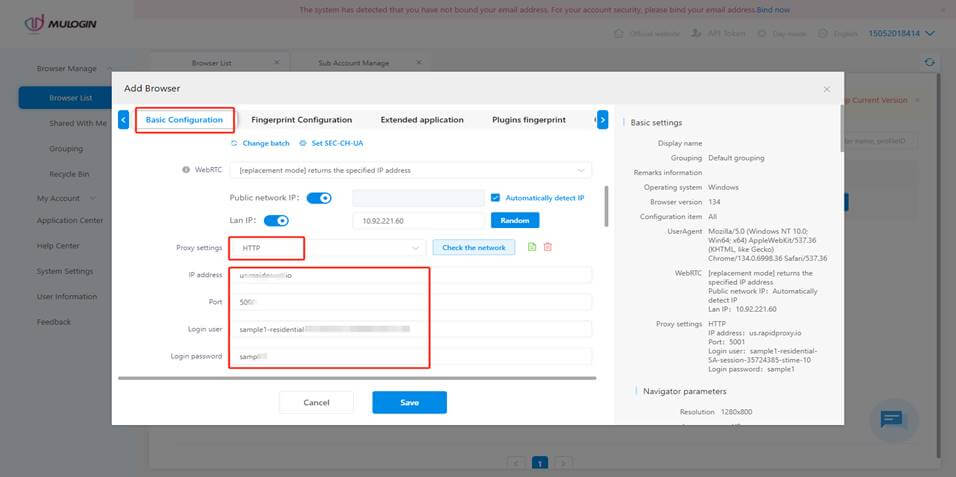
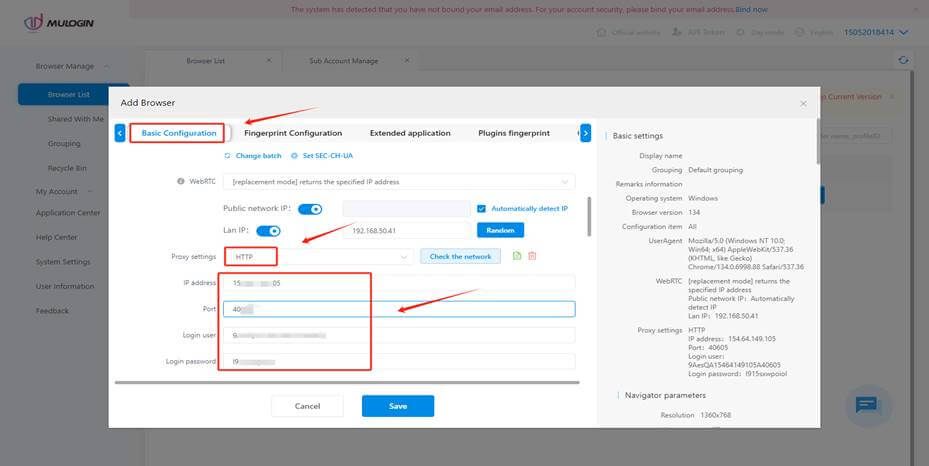
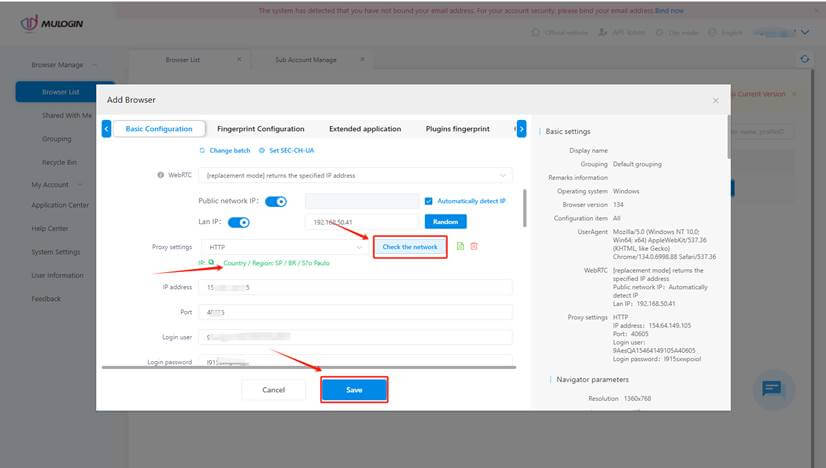
Step 8: Configure Proxy Settings
- In the 【Basic Configuration】 section, locate 【Proxy settings】 and select 【HTTP】.
- Paste the proxy details provided by Rapidproxy into the corresponding fields.
Note: This example uses HTTP; Rapidproxy supports HTTP/HTTPS/SOCKS5 protocols.
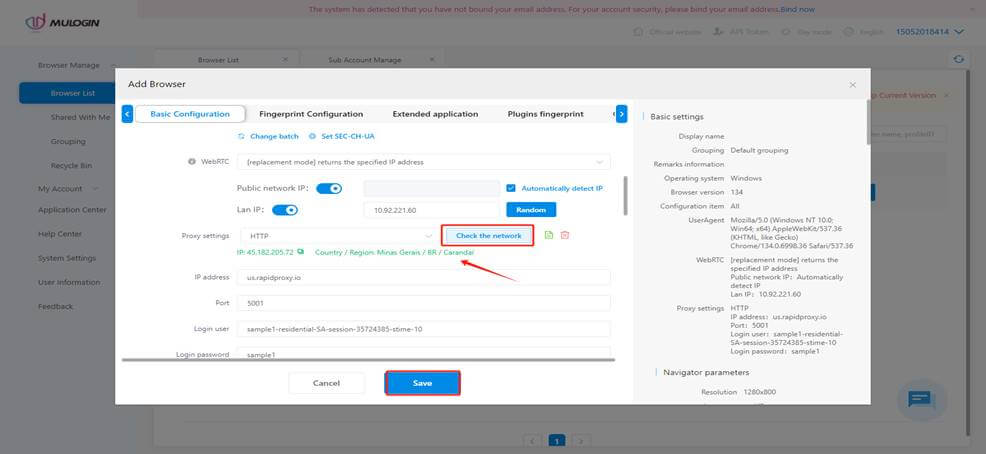
Step 9: Verify Proxy Connection
- Click 【Check the network】 to test the proxy connection.
- If successful, proxy details will be displayed.
- Click 【Save】 to save the configuration.
Setup Guide for Static Proxies
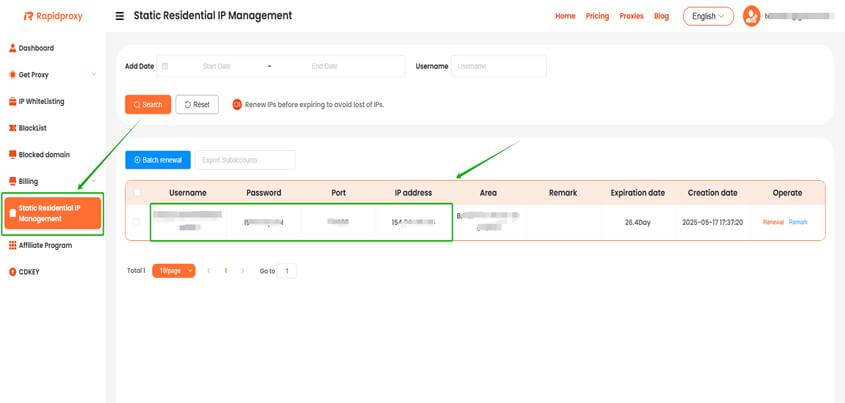
Step 1: Obtain Proxy Information
Log in to the RapidProxy dashboard, go to【Static Residential lP Management】, and obtain the proxy information:
IP Address : Port : Username : Password
Step 2: Configure the Proxy in Mulogin
1: Create a New Proxy Configuration
Navigate to 【Browser Manager】 — 【Browser List】 —【Add Browser】 to create a new profile.
2: Configure Proxy Settings
- In the 【Basic Configuration】 section, locate 【Proxy settings】 and select 【HTTP】.
- Paste the proxy details provided by Rapidproxy into the corresponding fields.
Note: This example uses HTTP; Rapidproxy supports HTTP/HTTPS/SOCKS5 protocols.
3: Verify Proxy Connection
- Click 【Check the network】 to test the proxy connection.
- If successful, proxy details will be displayed.
- Click 【Save】 to save the configuration.
Note: MuLogin does not provide IP proxy services, users need to buy from third-party platforms. Proxy-related tutorials are provided by third-party platforms and have nothing to do with MuLogin. Users are strictly prohibited from using this product to engage in any illegal and criminal activities, and users are responsible for any liability resulting from the use of this product.