YiluProxy proxy settings
Ⅰ. Download and install MuLogin (free three-day trial for new users).
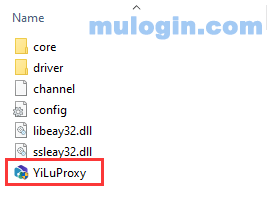
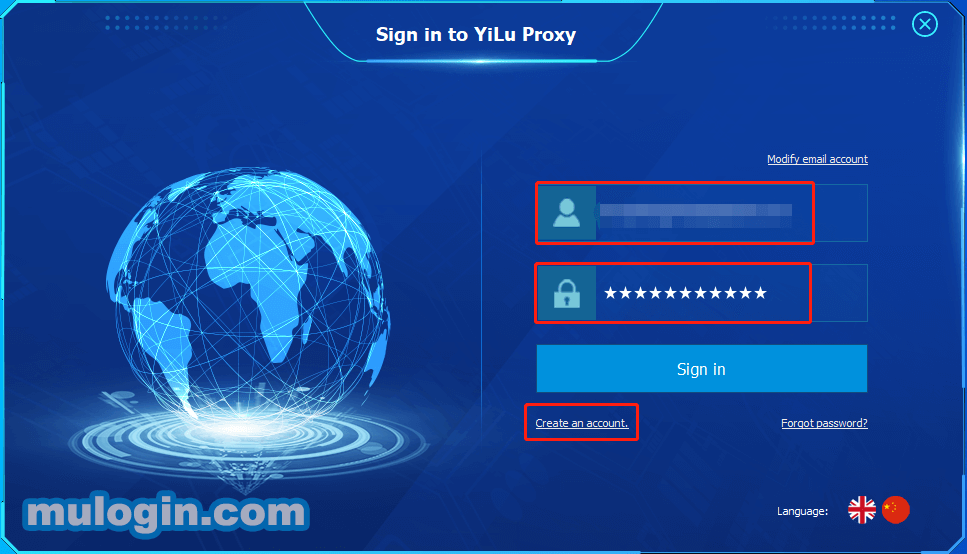
Ⅱ. Download and register the account of YiLuProxy, download and unzip, open the main program of YiLuProxy to run.
You can also refer to the related video tutorial.
Ⅰ. Basic setting of YiLuProxy
1. Randomly drag an application to the ”Program” TAB, such as Chrome browser, please do not drag MuLogin into the program, otherwise the connection will be unstable;

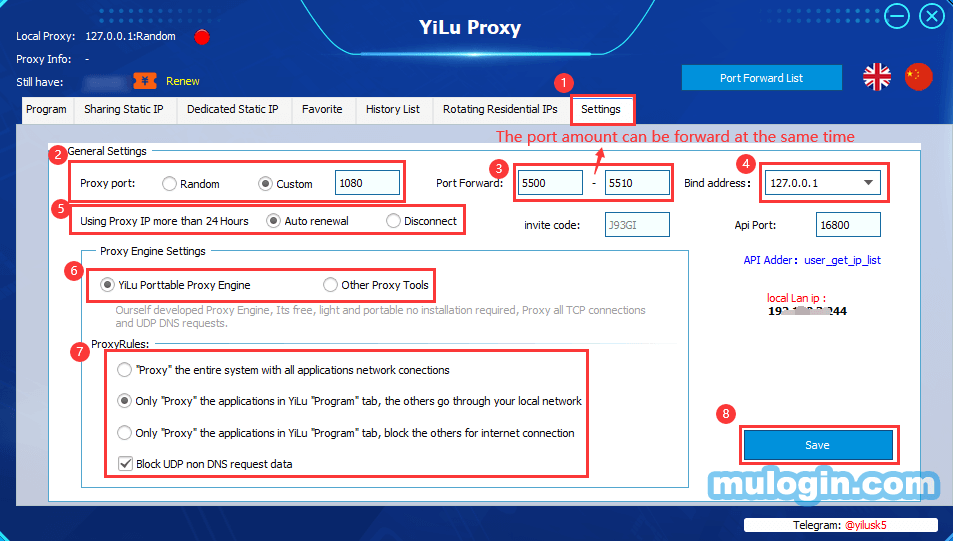
2. Click the "Settings" button:
① Proxy Port: Random and Custom are both OK;
② Port Forward: Set the port range according to your needs. For example, if you choose 5000 to 5010, that means the user can forward multiple ports at the same time, and every port should be set to an independent IP;
③ Bind address: Choose 127.0.0.1 if using on the computer;
④ Using Proxy IP more than 24 Hours: The user can choose “Auto renewal” or “Disconnect” for own needs;
⑤ Proxy Engine Settings: “YiLu Porttable Proxy Engine” or “Other Proxy Tools” are both OK;
⑥ Set the other settings by default;
⑦ Click “Save”.
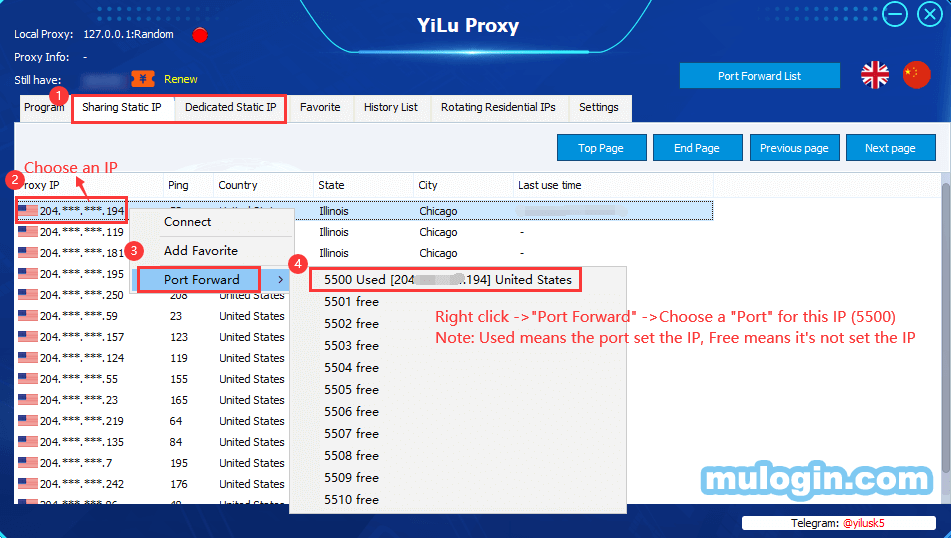
Ⅱ. “Sharing Static IP”/“Dedicated Static IP”/“Rotating Residential IPs” for Multiple Port Forward:
1. You can forward YiLuProxy’s proxy to several specific ports in your computer, to assign different proxy to each browser profile. This allow you to use the YiLuProxy proxy to open multiple MuLogin browser profiles and log into multiple accounts on multiple platforms at the same time. Here's how to set it up:
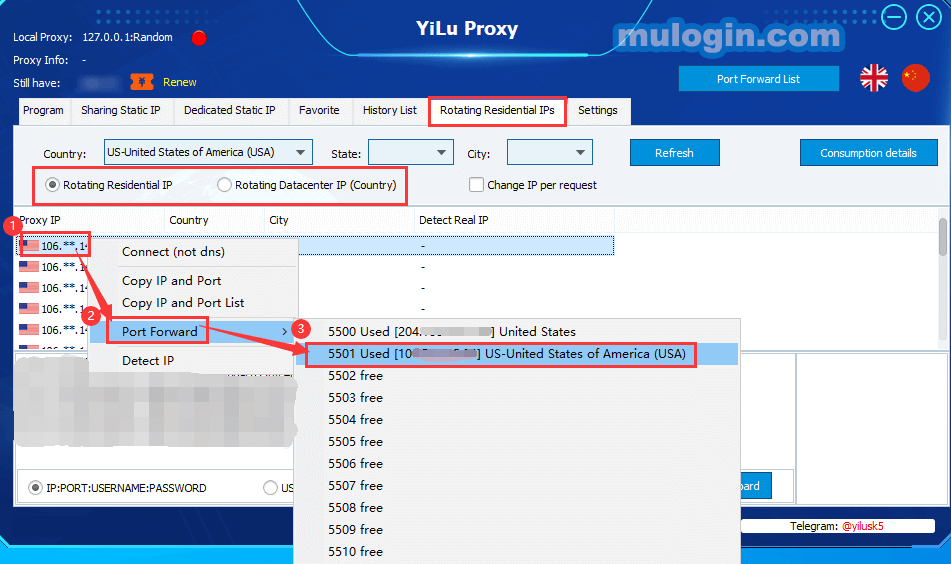
① Choose an IP and Right click;
② Choose “Port forward”;
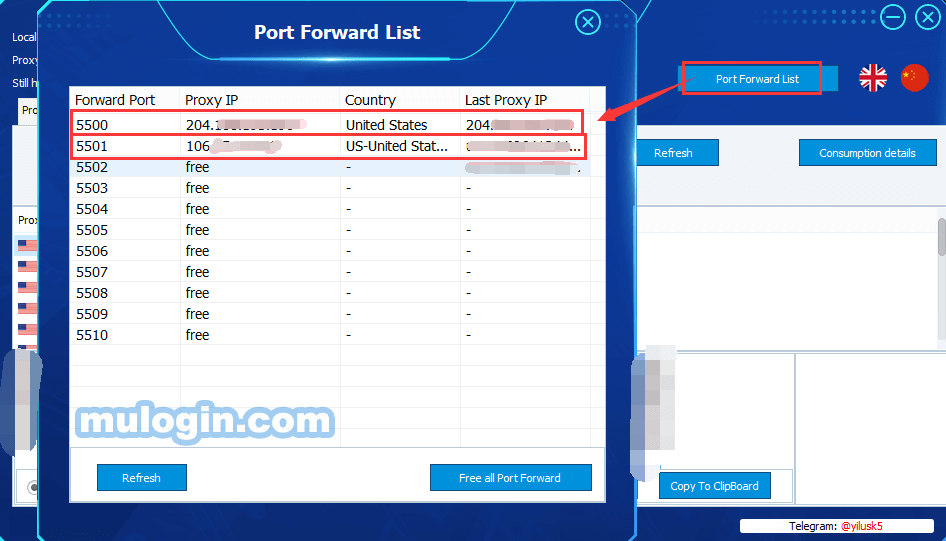
③ Choose a “Port”, each port only can set one IP at the same time, but you can change the IP for this port at any time. After set, you can also check IP information on “PortForwardList”.
Note:
- Used means the port has set IP, Free means it’s not set IP;
- The setting methods are the same for all IPs.
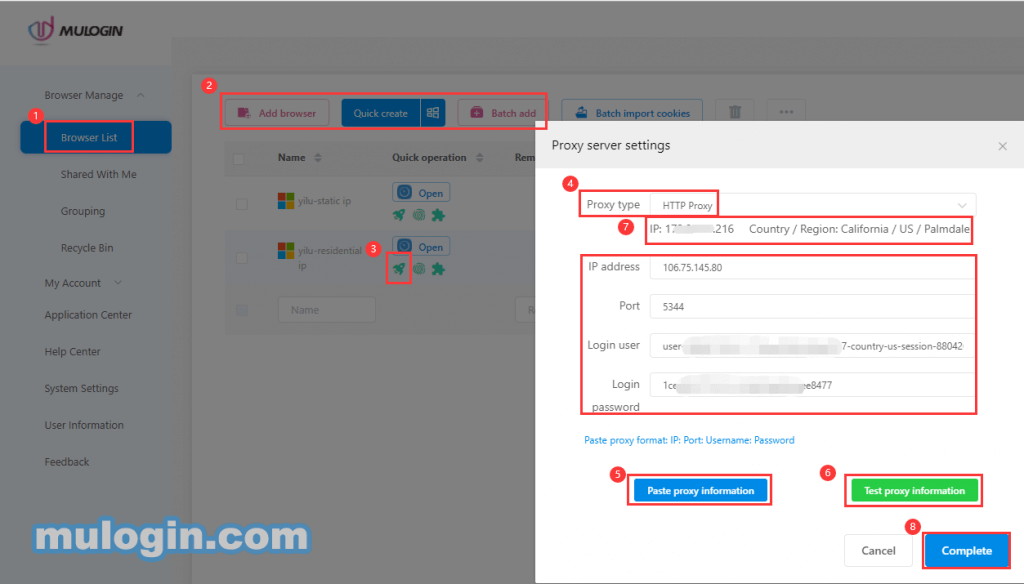
2. Download “MuLogin Antidetect Browser” (3 days free trial)
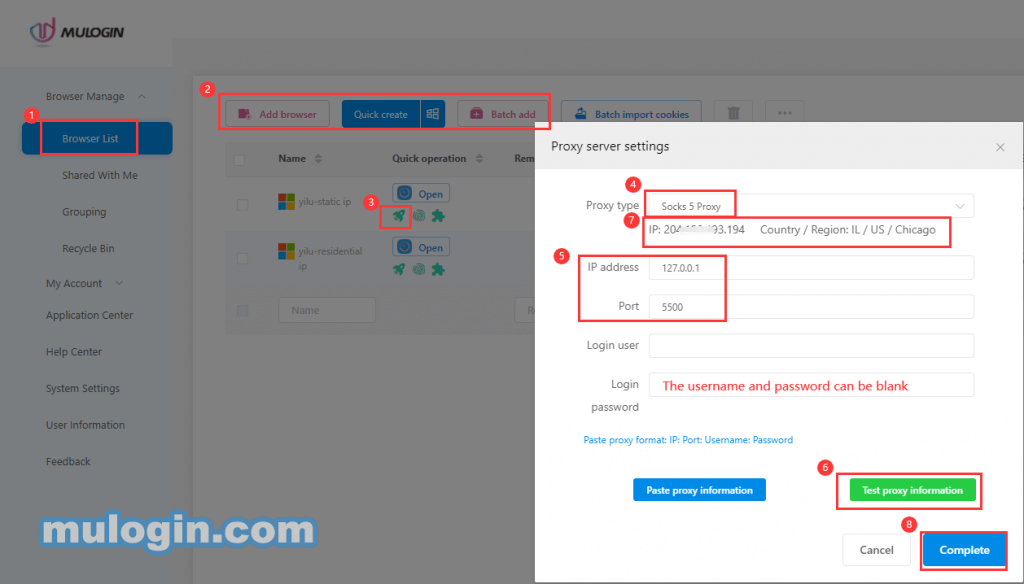
① Open MuLogin -> Click “Add browser”,“Quick create” or “Batch add” to create browser -> Basic configurations -> Setting proxy server or select![]() icon under "Created Browser";
icon under "Created Browser";
② Proxy type: Select SOCKS5 type for static IPs and either HTTP or SOCKS5 type for rotating IPs;
③ IP address: 127.0.0.1 (default setting);
④ Port: You can check the port on YiLu client (like 5500, 5501,5502, etc.,);
⑤ The username and password can be blank;
⑥ Click “Test proxy information” to test whether the proxy is connected or not, when it connects, you will see the IP information;
⑦ Click “Save”.
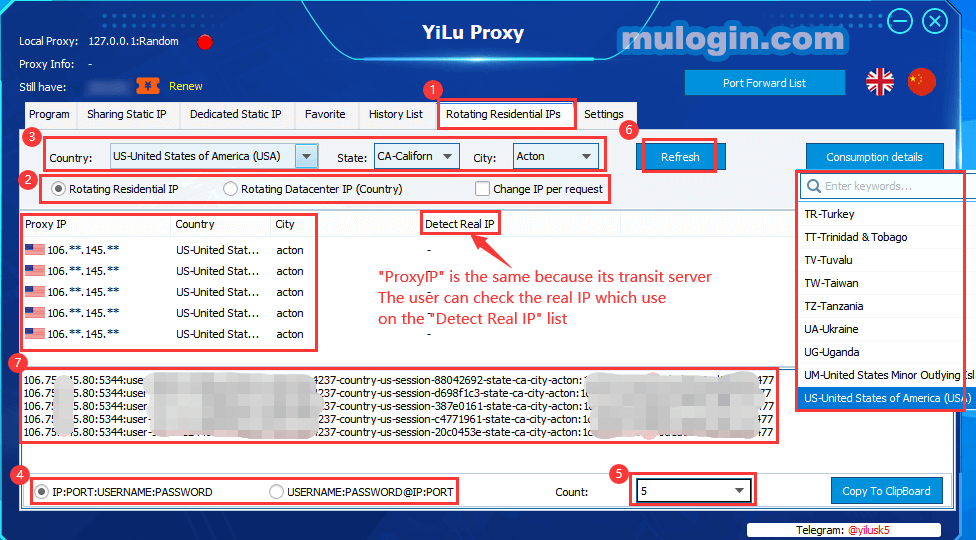
Ⅲ. Settings of “Rotating Residential IPs” / “Rotating Datacenter IPs”:
1. Click “Rotating Residential IPs” button;
2. Choose the “Rotating Residential IPs” or “Rotating Datacenter IPs” for your needs;
3. Choose Country、State and City (Rotating Datacenter IP does not support state and city selection at this time);
4. Choose the format for generating IP; ( “IP:PORT:USERNAME:PASSWORD” or “USERNAME:PASSWORD@IP:PORT” )
5. Select the number of IPs to be generated.
6. Click the "Refresh" button to extract IP information;
7. Copy IP:PORT:USERNAME:PASSWORD, and paste into Mulogin browser’s setting.
Note:
- Click "Copy to Clipboard" to save IP information locally and upload into Mulogin browser in batches.
- You can also extract IP information from "API Adder: user_get_ip_list" on YiLu "Settings" page.